
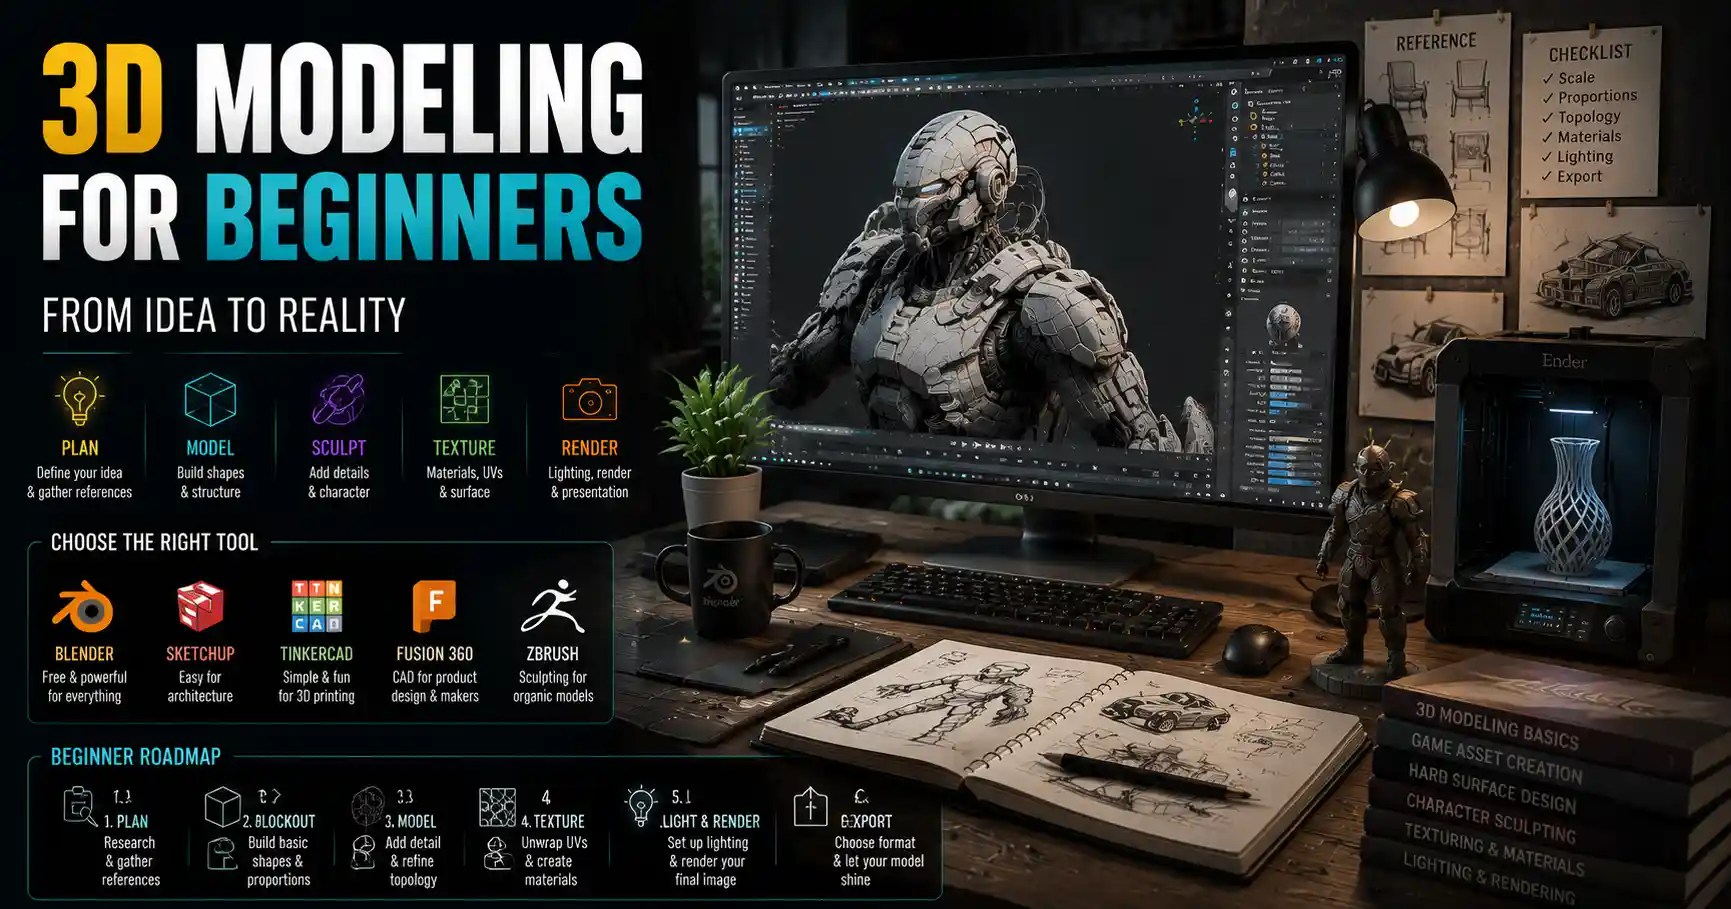
Ever scrolled through a 3D-printed figurine, a stunning video game environment, or a product prototype online and thought, “I wish I could make something like that”? For many beginners, creating a 3D model from scratch feels like a skill reserved for professional engineers or Hollywood animators. But with accessible software, free learning resources, and a step-by-step approach, anyone can learn to turn a simple idea into a fully realized 3D model. Whether you want to 3D print a custom gift, build assets for a indie game, or design a product for your small business, this guide will walk you through every stage of the process, from ideation to final export.
Plan Your Project Before You Open Software
Many new 3D artists jump straight into their modeling program before they have a clear idea of what they want to create, and that’s one of the most common reasons projects get abandoned. Before you touch any software, take the time to outline your project’s purpose, constraints, and reference materials. This planning stage saves hours of rework later and helps you stay focused as you work.
Define your project’s end goal and constraints
The first step in planning is clarifying how your 3D model will be used, because that dictates every design choice you make. A model designed for 3D printing has very different requirements than one built for a short film or a mobile game. For example, 3D printing models require perfectly closed shapes (called watertight meshes) with no overlapping geometry, while a game asset needs to keep the total number of polygons as low as possible to avoid slowing down performance.
You should also note any practical constraints up front. If you’re 3D printing a mug to fit a standard coffee machine, you’ll need to note the exact maximum diameter and height before you start modeling. If you’re building a character for a indie game, you might have a hard limit of 10,000 polygons to keep the game running smoothly on phones. Writing these constraints down early ensures you don’t have to scrap half your work to adjust for size or performance requirements later.
Gather reference images
Even the most experienced 3D artists don’t model from memory. Reference images keep your proportions accurate and help you capture small details that make your model look realistic. You don’t need a professional photo shoot — free sources like Google Images, Pinterest, Unsplash, and product catalogs work perfectly for most beginner projects.
If you’re modeling a real object, take your own photos from multiple angles: front, back, side, top, bottom, and close-ups of any unique details like buttons or carvings. A good rule of thumb is to have at least three orthographic (straight-on) views to use as a background in your modeling software. For example, if you’re modeling a chair, you’d have one front-facing photo, one side-facing photo, and one top-down photo to import as guides.
“Reference is not cheating. It’s how you learn to see correctly, and it’s how you make work that feels believable. Every professional artist uses reference, no matter how experienced they are.”
— Scott Benza, Senior Character Artist at Blizzard Entertainment
Choose the Right 3D Modeling Software for Your Project
Once you’ve planned your project, the next step is picking a 3D modeling program that fits your skill level, budget, and end goal. There’s no one “best” software — the right choice depends on what you’re making. Below are the most popular options sorted by use case, including free and paid choices for beginners.
Free beginner-friendly options
You don’t need to spend hundreds of dollars on software to start modeling from scratch. These free tools are powerful enough for most beginner projects and have large online communities that share tutorials and troubleshooting tips:
- Blender: The gold standard for free open-source 3D modeling. It supports every type of modeling, from hard-surface objects like furniture to organic characters, and includes built-in tools for texturing, animation, and rendering. It’s the most popular choice for beginners and professionals alike, with millions of free tutorials available on YouTube. Blender works on Windows, Mac, and Linux.
- SketchUp Free: A browser-based tool that’s incredibly easy to learn for architectural modeling, interior design, and simple hard-surface objects like furniture. It’s ideal if you want to model a room or a simple product without learning complex navigation.
- Tinkercad: A browser-based beginner tool from Autodesk designed for 3D printing. It uses simple shape-building blocks that make it perfect for kids or total beginners who want to create a small 3D-printable object in an afternoon.
Paid professional options
If you’re planning to turn 3D modeling into a career or need advanced tools for specific projects, these paid programs are industry standard:
- Autodesk Maya: The go-to for character animation and high-end film and game assets, used by most major studios. It offers advanced polygon modeling and simulation tools, with a subscription cost of around $200 per month.
- ZBrush: The industry standard for sculpting organic models like characters, creatures, and detailed statues. It’s designed to let you sculpt fine details just like you would with clay, and it costs around $40 per month or a one-time purchase of $900 for a permanent license.
- Autodesk Fusion 360: The top choice for product design and engineering, with built-in tools for 3D printing, CNC machining, and collaboration. It’s free for hobbyists and startups making less than $100,000 per year, with paid plans starting at $60 per month for professional users.
For most beginners starting out, Blender is the best choice. It’s 100% free, has every tool you need, and the community support means you can find an answer to almost any problem you run into in seconds. For this guide, we’ll assume you’re using Blender, but the core steps apply to any modeling program.
Master the Core Modeling Workflow: From Basic Shapes to Detailed Mesh
Regardless of what you’re modeling, the core process of building a 3D model from scratch follows the same general steps: blocking out basic shapes, adding secondary details, refining the topology, and adding fine details. Let’s break down each step with practical, actionable advice for beginners.
Step 1: Block out your basic shape
Blocking out is the process of creating a low-detail version of your model that establishes the overall size, proportions, and silhouette. This step helps you get the big picture right before you waste time adding small details that you’ll end up changing later.
Start by importing your reference images into your software as background images. In Blender, you can add reference images to the back, front, and side viewports to match your orthographic photos. Then, start with simple primitive shapes: cubes, spheres, cylinders, and planes. Most 3D models are just modified versions of these basic shapes.
For example, if you’re modeling a coffee mug, you’d start with a cylinder, scale it to the right height and width, then scale the top edge inward to create the opening. If you’re modeling a human character, you’d start with a cylinder for the torso, smaller cylinders for the arms and legs, and a sphere for the head. Don’t worry about small details at this point — just focus on getting the overall shape and proportions correct. Step back and compare your blockout to your reference photos often, and adjust until it matches.
Step 2: Add secondary details and refine your mesh
Once your blockout looks right, it’s time to add secondary details: things like the handle on your mug, the curve of a character’s shoulder, or the buttons on a shirt. This is where you’ll use core modeling tools to shape your basic primitive into the final form. The most common modeling techniques for this stage are:
- Polygon modeling: This is the most common technique for beginners, where you work by adjusting individual points (vertices), edges, and faces of your mesh. You can extrude faces to pull out new shapes, like extruding a circle from the side of your mug to create the base of the handle. You can also subdivide your mesh to add more geometry, which lets you create smoother, more curved shapes.
- Scultping: If you’re creating an organic model like a character or a rock, sculpting is often faster than polygon modeling. You start with a basic sphere or cube, then use sculpting brushes to push, pull, smooth, and carve the shape just like you would with real clay. Blender has built-in sculpting tools that are powerful enough for most beginner projects, and it’s a very intuitive way to work for people who prefer a more hands-on approach.
After adding secondary details, you’ll need to check your topology — the way the polygons are arranged on your mesh. Good topology means your polygons are mostly quadrilaterals (four-sided shapes) with no unnecessary triangles or n-gons (shapes with more than four sides) unless they’re in a place that won’t be deformed. For 3D printing, bad topology can cause errors when slicing your model, and for game assets, bad topology can make it harder to animate the model later. Take the time to clean up your mesh by deleting any hidden faces that you don’t need and rearranging edges to create a clean, consistent grid.
Step 3: Add fine details
Once your main shape is done, it’s time to add small fine details that bring your model to life. These could be things like scratches on a wooden table, pores on a character’s skin, or the tread on a shoe. There are two main ways to add fine details:
The first way is to add the details directly to your mesh, by sculpting or extruding small shapes. This is called “high-poly modeling,” and it’s ideal if you’re 3D printing your model, because the printer will actually print those details. The second way is to add details as a texture, which is common for game and film assets. You can use a process called baking to transfer the details from a high-poly sculpt to a low-poly game asset as a normal map, which adds the illusion of detail without adding extra polygons that slow down performance.
Check for Errors and Prepare Your Model for Its End Use
Even if your model looks perfect on screen, it can still have hidden errors that cause problems when you 3D print it, export it to a game engine, or render it. This step is where you fix those errors and export your model in the right format for how you’ll use it.
Check for common errors
The specific errors you need to check for depend on your end goal, but these are the most common issues that affect all 3D models:
- Non-manifold geometry: This is geometry that doesn’t have a clear inside and outside. Common examples include edges that are connected to more than two faces, faces that overlap, or holes in your mesh. For 3D printing, non-manifold geometry will almost always cause your slicer software to fail, and for other uses, it can cause rendering or animation errors.
- Open edges/holes: Unless you intentionally want an open shape (like the opening of your coffee mug), your model should be a closed mesh. Double-check that you haven’t left any small holes in areas where two shapes connect, like where the handle meets the mug.
- Extra hidden geometry: It’s common to leave extra faces or vertices hidden inside your model that you don’t need. These extra polygons increase file size and can cause errors, so delete any geometry you can’t see from the outside.
- Incorrect scale: Double-check that your model is the correct real-world size. If you’re 3D printing a 10cm tall figurine, make sure your model is actually set to 10cm in your software, not 10 meters. Most modeling software lets you add real-world units like centimeters or inches to your project, so use that feature.
Blender and most other modeling programs have built-in tools to automatically check for non-manifold geometry and other errors. In Blender, you can use the “3D Print Toolbox” add-on that comes pre-installed to scan your model for common errors and even fix many of them automatically.
Export your model in the right format
Once you’ve fixed all errors, it’s time to export your model in the correct file format for its end use. The most common formats are:
- STL: The standard format for 3D printing. It saves only the surface geometry of your model, which is what slicer software needs to generate G-code for your printer. Almost all 3D modeling programs support exporting to STL.
- OBJ/FBX: The most common formats for game assets, animation, and 3D graphics. FBX supports rigging and animation data, while OBJ is best for static models with texture data.
- STEP/IGES: The standard formats for engineering and manufacturing, used for CNC machining and product design. Fusion 360 and other CAD programs export these formats by default.
If you’re exporting a model with textures, make sure you save the texture files in the same folder as your model file, and check that the file paths are correct. Many beginners forget to include texture files when sharing their models, which results in the model appearing plain white when opened in another program.
Add Textures and Materials (For Rendering and Games)
If your model is going to be rendered (turned into a 2D image or video) or used in a game, you’ll need to add textures and materials to give it color, roughness, and other surface properties. A smooth grey mug model looks realistic once you add a glossy ceramic texture and a logo to the side, after all.
What are materials vs. textures?
A material defines the physical properties of your model’s surface: is it glossy plastic, rough wood, soft fabric, or clear glass? In modern PBR (physically based rendering) workflows, materials are made up of multiple maps that define different properties: a base color map, a roughness map, a metallic map, and a normal map for fine detail.
For beginners, you don’t need to paint all your own textures from scratch. There are thousands of free PBR texture packs available online on sites like Poly Haven, TexturingXYZ, and CGTrader that you can use for non-commercial and even commercial projects. For example, if you’re modeling a wooden table, you can download a free oak wood PBR texture and apply it to your model in a few clicks.
Beginner texturing tips
If you’re new to texturing, start simple. Use pre-made textures for your first few projects to learn how different settings affect the final look. Once you’re comfortable with that, you can start painting your own custom textures using Blender’s built-in texture painting tool or a free program like GIMP. For adding small details like logos or text, you can easily import a 2D image and wrap it around your 3D model using UV mapping — the process of unwrapping your 3D mesh into a 2D space so textures can be applied correctly.
When you’re done texturing, you can render your model to create a final high-quality image. Blender’s built-in Cycles renderer produces photorealistic results for free, and you can adjust lighting and camera settings to get the exact look you want.
Conclusion
Creating a 3D model from scratch is a process that rewards patience and practice, not natural talent. By starting with a clear plan, choosing the right software for your project, and working step-by-step from basic shapes to final details, you can turn any idea into a finished 3D model. The most important thing for beginners is to start small: don’t try to model a full character for a game as your first project. Start with a simple object like a mug, a chair, or a keychain, and work your way up to more complex projects as you build confidence. Every 3D artist you admire started with exactly where you are now, and the only way to get better is to keep modeling, fix your mistakes, and learn something new with every project. With the free tools and resources available today, there’s never been a better time to start.