
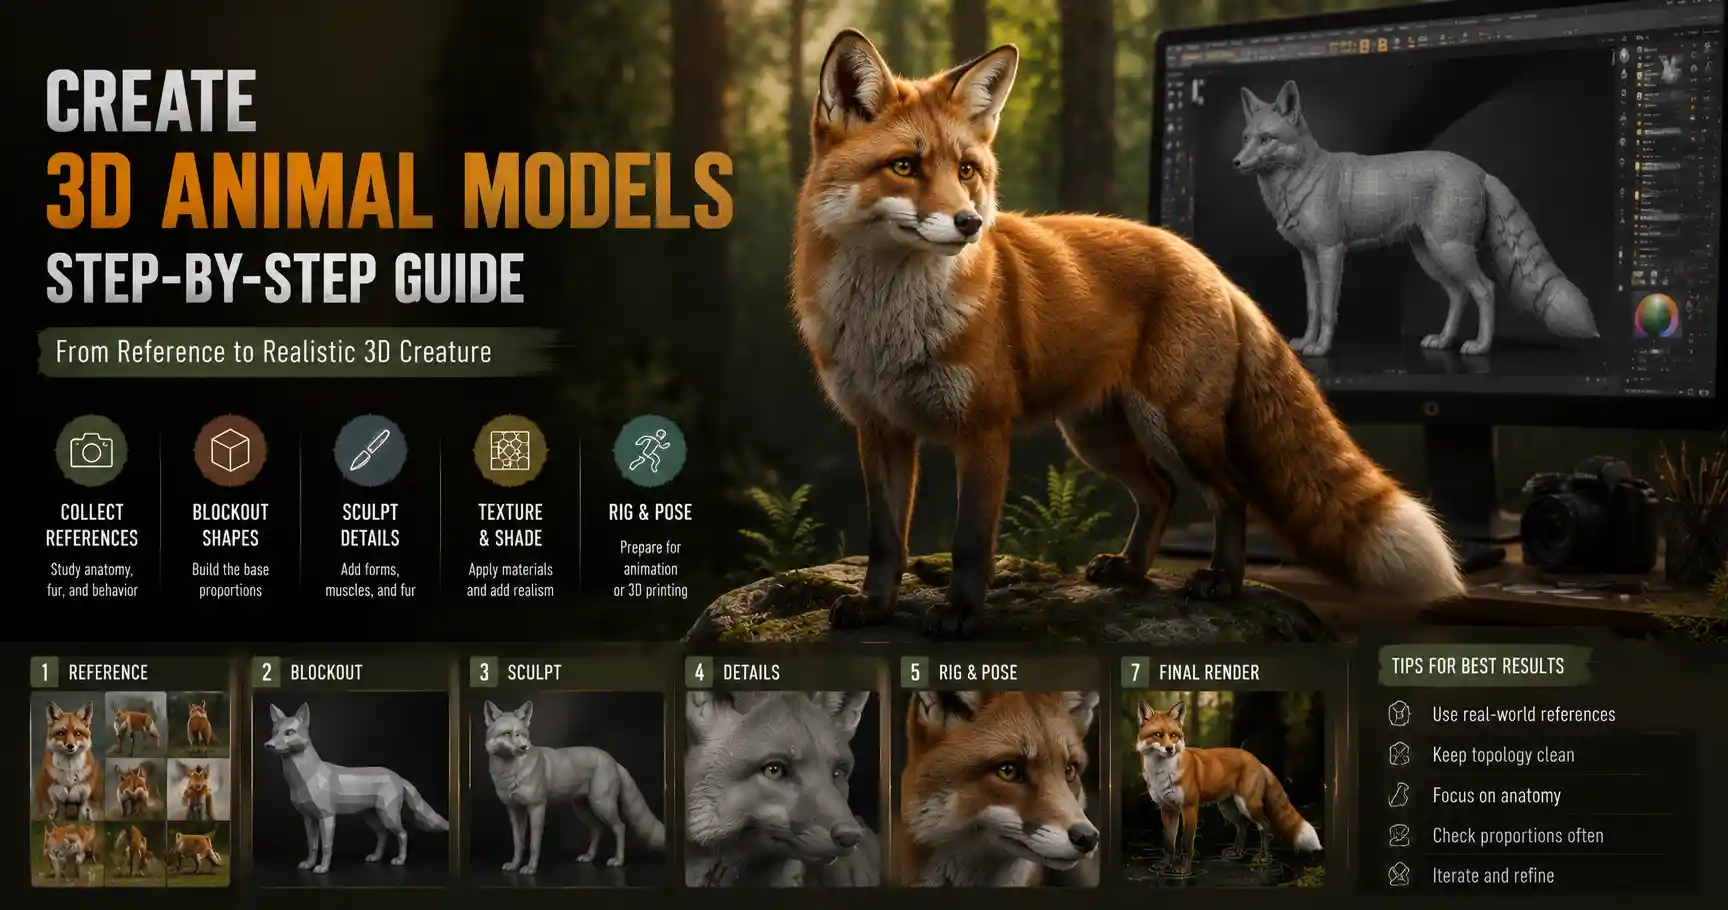
Whether you’re a game developer building a open-world wildlife sanctuary, an animator creating a viral short film, a 3D printing enthusiast designing a custom figurine, or a biology teacher creating interactive learning materials, a well-made 3D animal model can bring your project to life. Unlike static 2D illustrations, 3D models let you rotate, resize, and animate creatures to fit almost any use case – but getting started can feel overwhelming if you’ve never tackled organic modeling before. Unlike hard-surface objects like furniture or cars, animals have curved forms, soft textures, and unique anatomical details that require a specific approach to get right. This step-by-step guide breaks down the entire process, from planning your model to exporting the final file, so you can create accurate, usable 3D animal models regardless of your experience level.
Plan Your Model and Gather Reference Materials
Before you open a 3D modeling program, the most important step to creating a believable 3D animal model is planning and research. Even the most experienced 3D artists don’t try to model an animal from memory – anatomical inaccuracies are easy to spot, and they can ruin an otherwise polished model. The type of reference you need depends on your end goal: a model for 3D printing needs accurate external proportions, while a model for animation needs clear references for muscle and joint movement.
Define your project requirements first
Start by clarifying what your model will be used for, as this will shape every decision you make later. Ask yourself three key questions: What level of detail do I need? Will the model be animated, or is it a static object? What file format and polygon count does my project require? For example, a low-poly red fox model for a mobile indie game will only need a few thousand polygons, while a hyper-realistic tiger model for a Hollywood feature film might require millions of polygons to capture every stripe and whisker follicle. A model for 3D printing needs to be a solid, watertight mesh, while a model for AR filters needs to be optimized for real-time rendering on a phone.
Gather high-quality reference images
Once you know your project requirements, start collecting references from multiple angles. Good references don’t just show what an animal looks like – they show how it moves, how its fur lays, and how its anatomy changes in different poses. Aim for at least three core views: a front-facing shot, a side profile, and a back view. If you can, find references of the animal in different poses to understand how muscles and skin stretch and move. For rare or extinct animals, paleoart references and museum fossil scans can help you accurately reconstruct proportions that aren’t visible in photos.
- Use free resources like Unsplash, Pexels, and Flickr Creative Commons for high-resolution, royalty-free photos of live animals.
- Check scientific databases and natural history museum websites for accurate anatomical diagrams of skeletons and muscle structure, especially for lesser-known species.
- YouTube documentaries and wildlife channels are great references for how animals move, stand, and interact with their environment.
- If you’re modeling a domestic animal or common pet, take your own photos from multiple angles to get exactly the references you need.
Many 3D modeling programs let you import reference images directly into the viewport as background images, so you can trace proportions directly as you work. Organize your references into a folder before you start modeling to avoid stopping mid-workflow to search for a missing angle.
Choose the Right 3D Modeling Workflow
There are multiple ways to create a 3D animal model, and the best workflow for you depends on your skill level, equipment, and project requirements. Beginners don’t need to invest in expensive professional software to get started – there are powerful free options that work just as well for small projects. Broadly, 3D animal modeling falls into two main categories: handmade polygonal modeling, and 3D scanning.
Handmade polygonal modeling (traditional workflow)
Handmade modeling is the most common approach, and it gives you full control over every part of your model. For organic shapes like animals, the most popular sub-workflow is blocking out base shapes, then refining the mesh with sculpting. Start with a simple primitive shape like a sphere or cube, then split and pull vertices to match the animal’s overall proportions. This method lets you adjust proportions at any stage, and it’s ideal for creating custom models from scratch.
The most popular software for handmade 3D animal modeling includes:
- Blender: Free, open-source software that includes everything from modeling to sculpting, texturing, and animation. It’s the most popular choice for beginners and independent creators, and it has a massive global community that creates free tutorials and assets.
- ZBrush: The industry standard for high-resolution organic sculpting, used by major game and film studios. It’s particularly good for capturing fine details like wrinkles, fur texture, and scales, but it comes with a steep learning curve and a paid subscription.
- Autodesk Maya: A professional all-around 3D software popular for animated projects, with powerful modeling and rigging tools.
- SculptGL: A free browser-based sculpting tool perfect for beginners who want to practice without downloading software.
3D scanning (photogrammetry workflow)
If you need an extremely accurate model and you have access to a real animal (or a high-quality taxidermy specimen), 3D scanning or photogrammetry can create a model in a fraction of the time of handmade modeling. Photogrammetry works by taking hundreds of photos of an animal from every angle, then using software to stitch the photos together into a 3D mesh. Professional 3D scanners can create incredibly detailed models, but even a smartphone camera can produce good results for smaller animals with free photogrammetry software like Meshroom.
Photogrammetry is a great option if you need a hyper-realistic model quickly, but it has some drawbacks: scanned models often have very high polygon counts that need to be optimized for games or 3D printing, and you’ll still need to clean up errors in the mesh after scanning. It’s also not an option if you’re modeling an extinct animal or a fantasy creature that doesn’t exist in real life.
“The best 3D animal models aren’t just geometrically accurate – they capture the essence of the animal. Whether you’re hand-sculpting or scanning, you need to study how the animal moves and holds itself before you ever touch a vertex.”
— Natalia García, lead 3D character artist at Blizzard Entertainment
Step-by-Step Process for Handmade 3D Animal Modeling
For beginners starting from scratch, the handmade polygonal sculpting workflow is the best way to learn the fundamentals of 3D animal modeling. Follow this step-by-step process to go from a blank canvas to a finished base mesh.
1. Block out the base proportions
Start by blocking out the largest, most important shapes of the animal first, ignoring small details. The goal here is to get the overall proportions right before you add any fine features – bad proportions at this stage will ruin your model later, even if your details are perfect. Use simple primitive shapes (spheres for the head and torso, cylinders for legs and tails) to map out the animal’s basic structure. Compare your blockout to your reference images constantly: check the length of the legs compared to the torso, the size of the head compared to the body, and the position of the shoulders and hips.
For example, if you’re modeling a wolf, a common beginner mistake is making the head too large and the legs too short compared to a real wolf. Don’t move on to the next step until your blockout matches the reference proportions from every angle.
2. Refine the base mesh
Once your blockout is correct, connect the separate primitive shapes into a single continuous mesh, then refine the large forms. Add edge loops to create more geometry where you need it, such as around the shoulders, neck, and head, and pull vertices to shape the muscle groups and skeletal structure. It’s helpful to start with the underlying skeleton and build muscle on top of it – this ensures your anatomy is accurate, even if the skeleton won’t be visible in the final model.
At this stage, your mesh should be clean and have a consistent polygon density. Avoid adding too many polygons early on – this can make it harder to adjust large shapes, and it can slow down your computer. A clean base mesh also makes it easier to add details later and to rig the model for animation if needed.
3. Sculpt fine details
Once your base mesh is proportionally correct and the large forms are refined, it’s time to move to sculpting fine details. If you’re working in Blender, you can use the multiresolution modifier to add subdivisions to your base mesh, which lets you sculpt fine details without changing your original base shape. If you’re working in ZBrush, you can use dynamic subdivision to add geometry as you go.
Focus on adding details in order of size: start with large muscle definition, then move to medium details like wrinkles around the eyes and joints, then fine details like skin pores, scales, or whisker follicles. Don’t overdo details at this stage unless you’re creating a high-resolution model for film or print – for real-time game models, most fine details can be added later with texture maps instead of geometry.
4. Retopologize the mesh (if needed)
If you sculpted a high-resolution mesh, you’ll need to create a clean, low-polygon version of the model for use in games, animation, or 3D printing. This process is called retopology. Retopology involves creating a new mesh over the top of your high-resolution sculpt, matching the shape of the original while using far fewer polygons and keeping a clean edge flow. Good edge flow is especially important if you plan to animate your model, as it ensures the model deforms correctly when you move the joints.
Most modern 3D programs have automated retopology tools that can speed up this process, but it’s still a good idea to manually clean up any messy areas around joints and high-curvature parts like the head and feet. After retopology, you can bake the high-resolution details from your sculpt onto the low-resolution mesh using normal maps or displacement maps, so the low-poly model still looks like it has all the fine details of the high-poly sculpt.
5. UV unwrapping
Before you can add textures to your model, you need to create UVs. UV unwrapping is the process of flattening your 3D mesh into a 2D map, so your texturing software knows how to apply 2D texture images to the 3D surface. Think of it like cutting apart a stuffed animal so you can lay the fabric flat to print a pattern on it. For animal models, it’s best to hide UV seams in places that aren’t easily visible, like under the chin, along the back, or inside the legs, to avoid visible stretching or seams on the finished model.
Like retopology, many modern programs have automated UV unwrapping tools that work well for simple models, but manually adjusting UVs will give you better results, especially for complex organic shapes. Make sure that different parts of the mesh have consistent texel density (the amount of texture detail per unit of mesh) so the fur or skin doesn’t look blurry on some parts and over-detailed on others.
Texturing, Rigging, and Final Touches
A finished mesh is only half of a good 3D animal model – the texturing and rigging steps bring the model to life and make it usable for your project. Even a perfectly sculpted model can look flat and unrealistic with bad texturing, so this step is worth taking your time with.
Texturing your model
Texturing adds color, detail, and surface properties to your model. For most animal models, you’ll need multiple texture maps to get a realistic result: a color map for the base fur or skin color and patterns (like spots or stripes), a roughness map to define how shiny or matte different parts of the surface are, a normal map to add fine detail from your high-resolution sculpt, and an ambient occlusion map to add soft shadows in crevices like between legs or under the jaw.
There are two main approaches to texturing 3D animal models: using pre-made texture assets, or hand-painting your own. For beginners, pre-made PBR (physically based rendering) texture sets from sites like Poly Haven or Texture Haven are a great way to get realistic results quickly. You can adjust the colors and patterns to match your reference, and they’re already optimized for real-time rendering. If you need a custom pattern or a specific look, you can hand-paint textures directly on your model in software like Substance Painter or Blender’s texture paint workspace.
For fur, you have two main options: you can add fur texture to a texture map for low-poly models, or you can generate actual 3D hair fibers with a hair particle system for hyper-realistic models. 3D fur looks incredible, but it’s very computationally expensive, so it’s only used for high-end projects like film or static renderings. For games and animation, textured fur with a hair card technique (using planes with transparent fur textures) is a popular optimized alternative.
Rigging for animation
If you plan to animate your model, you’ll need to rig it after texturing. Rigging is the process of adding a digital skeleton (called an armature) to your model, then weighting the mesh so the vertices move with the skeleton bones. Good rigging requires a solid understanding of animal anatomy, because you need to place the bones in the correct position to match the animal’s actual skeleton. For example, a dog’s back legs bend in a different direction than a human’s legs, so placing bones incorrectly will lead to unnatural movement when you animate.
Beginner-friendly tips for rigging 3D animal models:
- Start with a pre-made animal rig base that you can adjust to fit your model, rather than building a rig from scratch. Many creators share free rig bases for common animals in Blender and other programs.
- Pay extra attention to weight painting around joints – incorrect weighting will cause weird stretching or collapsing when you bend the leg or neck.
- Test your rig in a few different poses after you finish rigging to catch any deformations before you start animating.
- Add control handles for common movements like tail wagging or ear twitching to make animation easier later.
Final quality check
Before you export your model for use, do a final check to catch common errors. If you’re 3D printing, check for non-manifold geometry, holes in the mesh, and overlapping faces that will cause your slicer software to crash. If you’re using the model in a game or app, check the polygon count to make sure it fits your project’s requirements, and test how it looks in your engine to make sure textures load correctly. For animated models, test all of the range of motion of your rig to make sure there are no unexpected deformations.
Conclusion
Creating 3D animal models takes practice, but it’s an accessible skill for anyone willing to put in the time to learn the fundamentals. The most important step – one that many beginners skip – is spending time on planning and reference gathering before you start modeling. Good references and accurate proportions are far more important than perfect fine details, and they’ll make every subsequent step of the process easier. Whether you choose a handmade workflow for full creative control or photogrammetry for quick, accurate results, the process boils down to starting with large shapes, working your way down to fine details, and constantly checking your work against your references. Start small with a simple animal like a cat or fox to practice the workflow, then work your way up to more complex creatures as you build confidence. With the right approach, you’ll be creating polished, usable 3D animal models for your projects in no time.