
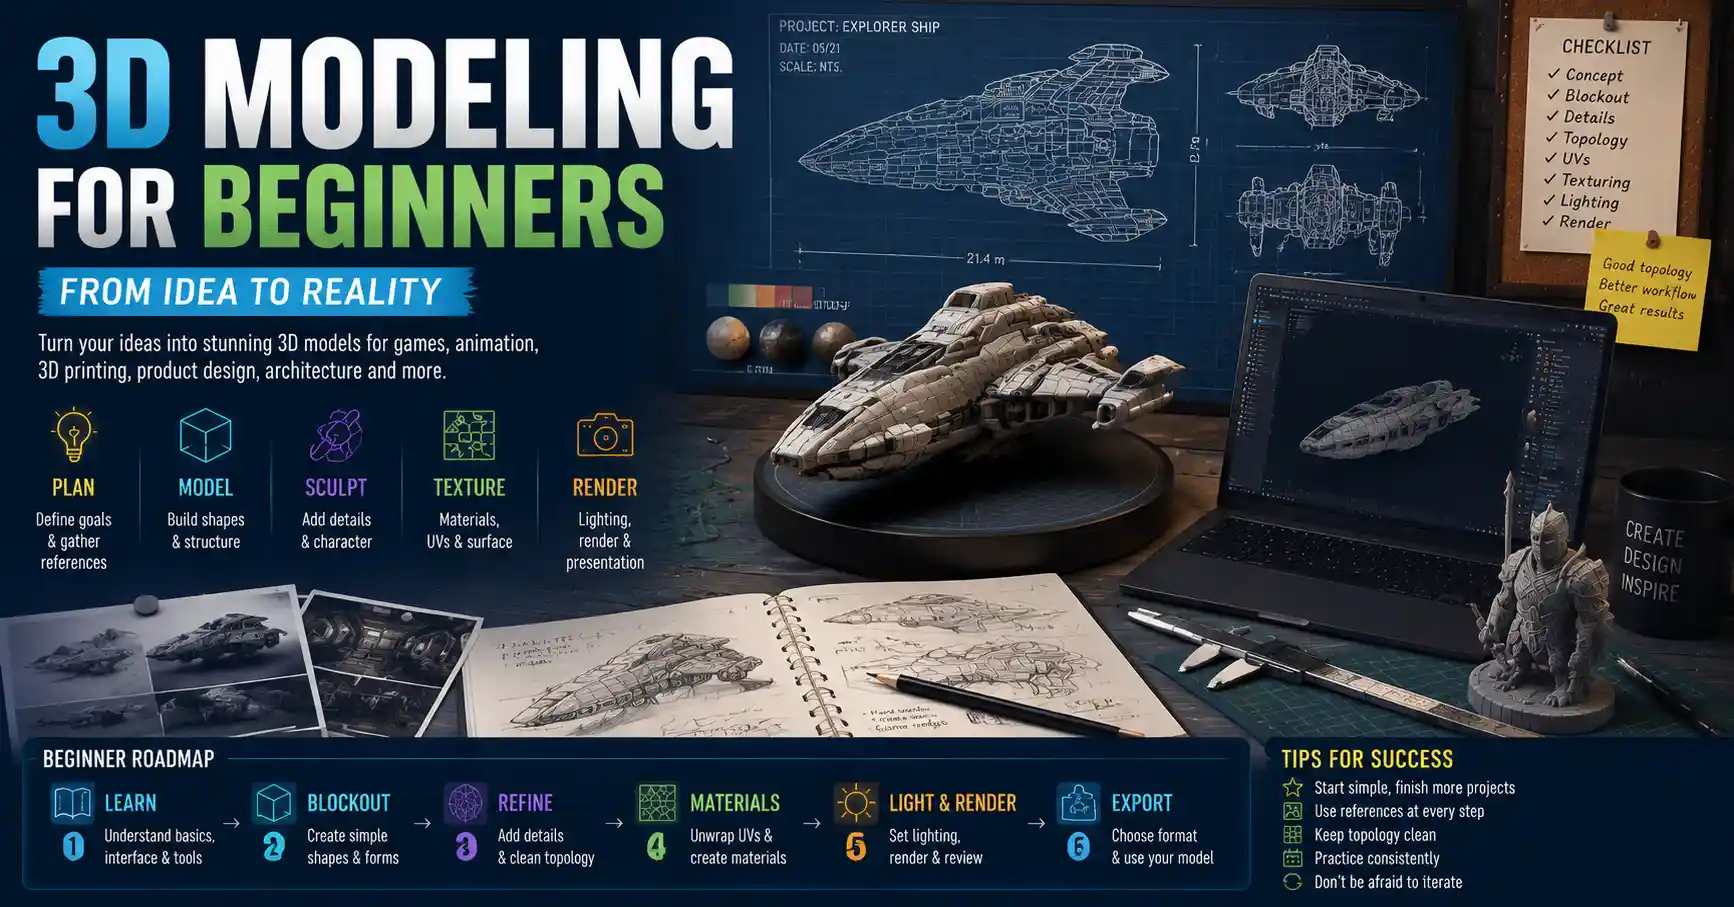
3D modeling has evolved from a niche skill used exclusively by industrial designers and Hollywood special effects teams to an accessible tool for creators across every industry. Today, game developers, product designers, architects, and even hobbyists use 3D models to prototype products, build immersive virtual worlds, create 3D prints, and visualize architectural projects before groundbreaking. Whether you’re looking to launch a career in 3D design, create custom assets for your indie game, or print a one-of-a-kind product at home, learning to design intentional, functional 3D models is about more than mastering software—it’s about understanding core principles that turn a vague idea into a usable, high-quality asset.
Start With Pre-Design Planning and Goal Setting
Many new designers jump straight into their 3D modeling software before they have a clear idea of what they want to create, and that’s where most projects go off the rails. A well-designed 3D model starts long before you click “create new project” by defining your core goals and constraints. Pre-design planning saves hours of rework later and ensures your final model fits its intended purpose.
Define your model’s end use
Every 3D model has different requirements based on how it will be used, and there’s no such thing as a one-size-fits-all design. A model meant for 3D printing needs completely different geometry than a model meant for a real-time mobile game, just as an architectural rendering for a client presentation needs different detail than a prototyping model for industrial testing. Ask yourself these key questions to narrow your requirements:
- Will this model be 3D printed, molded, or manufactured physically? If yes, it needs to be a solid, watertight mesh with no overlapping geometry and appropriate wall thickness.
- Will it be used in a real-time game or interactive experience? If yes, it needs a low polygon count to avoid slowing down frame rates, with detail added through textures instead of geometry.
- Is it for a high-resolution render or cinematic animation? If yes, you can afford more complex geometry and fine detail to create a photorealistic final result.
- Is it a prototype for testing, or a final finished asset? Prototypes can be lower resolution to speed up design iterations.
For example, a 3D model of a coffee mug designed for 3D printing needs a hollow interior, thick enough walls to avoid breaking, and no gaps in the outer mesh. A 3D model of the same mug designed as a background prop in a mobile game only needs a visible outer shell with a simple texture, and a polygon count low enough to not impact performance. Skipping this step often leads to models that are too heavy for their use case or don’t work at all for physical manufacturing.
Gather reference material and sketch your concept
Even the most experienced 3D designers don’t design from memory when working on complex models. Reference material keeps your proportions accurate and helps you catch small details you might otherwise miss. Start by collecting multiple photos of your subject from every angle, technical diagrams if you’re designing a functional part, and sketches of how you want the final model to look.
If you’re designing an original character, for example, collect references for body type, clothing textures, facial features, and any unique accessories. If you’re designing a mechanical part, pull up engineering schematics or dimensioned drawings to confirm your measurements are correct. Most 3D software lets you import reference images directly into your viewport as a guide, so you can trace over proportions rather than guessing.
Choose the Right Modeling Workflow for Your Project
There isn’t just one way to create a 3D model, and different workflows are better suited to different projects and skill levels. Choosing the right approach from the start will make your process faster and your final result higher quality. Below are the most common 3D modeling workflows, and when to use each.
Polygon modeling (box modeling)
Polygon modeling, also called box modeling, is the most common workflow for game design, character modeling, and hard-surface design. It starts with a basic primitive shape—a cube, sphere, or cylinder—and you gradually add edge loops, subdivide surfaces, and pull vertices to shape the model into your desired form. It’s flexible, works with almost every 3D software, and is the best starting point for new designers because it teaches core fundamentals of mesh topology.
Topology, the arrangement of polygons on your mesh, is one of the most important parts of polygon modeling. Good topology keeps your model smooth when it’s deformed (for animated characters) and makes it easier to edit later. For hard-surface models like furniture or mechanical parts, you’ll generally want clean edge loops around holes and curved corners to keep lines sharp.
Parametric and CAD modeling
Parametric computer-aided design (CAD) modeling is the standard for industrial design, engineering, and manufacturing. Unlike polygon modeling, which shapes surfaces by adjusting individual vertices, parametric modeling builds your model from a series of editable parameters and dimensions. If you change one dimension early in the design, the entire model updates automatically, which makes it perfect for iterative design and parts that require precise measurements.
For example, if you’re designing a custom bracket to hold a camera on a bike, parametric CAD lets you set exact hole spacing and thickness to match your bike’s frame. If you later realize you need to widen the bracket by 10mm, you just update that one dimension, and the entire model adjusts without you having to remodel every part. Common parametric CAD tools include Fusion 360, SolidWorks, and Rhino, and this workflow is non-negotiable for any model that will be manufactured physically.
Sculpting
Digital sculpting works like traditional clay sculpting: you start with a base mesh and push, pull, pinch, and smooth the surface to add fine organic detail. It’s the go-to workflow for character models, creatures, sculptural art, and adding fine details like wrinkles, pores, or texture to organic shapes. Modern sculpting tools like ZBrush or Blender’s Sculpt Mode let you work with millions of polygons to create incredibly detailed results, which you can then bake down to a lower-polygon mesh for real-time use.
Many designers use a combination of workflows: for example, you might block out a character’s basic shape with polygon modeling, then add fine detail like skin texture and clothing folds with sculpting. For 3D printing, sculpting is perfect for organic models like figurines or artistic pieces that don’t require precise mechanical dimensions.
“A good 3D model isn’t just about how it looks—it’s about how it works for its intended purpose. A 500-polygon model that runs smoothly in a mobile game is better designed than a 5-million-polygon model that crashes the engine, even if the high-poly version looks more detailed.”
— Jamie Gilmour, lead 3D artist at Riot Games
Master Core Design Principles for High-Quality Models
Once you’ve planned your project and chosen your workflow, following core design principles will help you avoid common mistakes and create professional-looking models. These principles apply to every type of 3D modeling, regardless of your end use or software.
Keep your geometry clean and non-destructive
Clean geometry is the foundation of a good 3D model. Messy geometry causes problems at every stage of the process, from rendering to 3D printing to animation. What counts as clean geometry depends on your workflow, but there are some universal rules to follow:
- Avoid non-manifold geometry: This is geometry with edges connected to more than two faces, or faces that have no volume. Most 3D printing slicers will reject models with non-manifold geometry, and it causes rendering errors in animations.
- Remove unnecessary polygons: Extra polygons that don’t add any detail to your model just increase file size and slow down your workflow. Delete hidden faces (like the bottom of a mug that sits on a table if it’s for a render, but keep them if it’s for 3D printing) and merge overlapping vertices to reduce polygon count.
- Use non-destructive modeling when possible: Non-destructive modeling keeps your original editable steps intact, so you can go back and change an early part of your design without redoing the entire model. For example, using modifier stacks in Blender or parametric features in Fusion 360 lets you edit your work at any stage, instead of permanently deleting or changing geometry.
Most software includes built-in tools to check for errors: for example, Blender has a “clean up” tool that finds non-manifold edges and removes duplicate vertices, and CAD tools automatically check for solid geometry. Make a habit of running these checks every few steps to catch errors early before they become harder to fix.
Get proportions and scale right from the start
One of the most common mistakes new designers make is ignoring real-world scale. If you’re designing a chair that needs to fit a human body, designing it 20% too small or too large will make it useless for manufacturing or architectural visualization. Even for artistic models, incorrect proportions throw off the entire design and make it look unprofessional.
Start your project by setting your document units to match your needs: use millimeters or inches for 3D printing and manufacturing, meters for architectural models. Block out the basic overall shape of your model first, and confirm your proportions and scale before adding fine detail. For example, if you’re designing a human character, block out the full body with basic primitives first to make sure the head is the right size relative to the torso, and the arms are the correct length, before you add facial features or clothing. It’s much easier to adjust proportions on a simple blockout than it is to fix them after you’ve added hours of fine detail.
Use proper topology for your use case
Topology matters more for some projects than others, but it’s always worth paying attention to. For animated characters, you need edge loops that flow with the way the model will deform: for example, edge loops around the shoulders and mouth that let the character move without creating weird wrinkles or pinching. For hard-surface models, you need clean edges around curved corners to get a smooth, sharp result when you subdivide the surface.
A good rule of thumb for real-time models is to only add polygons where you need them: put more detail around high-curvature areas like eyes or corners, and keep polygon count low on flat areas like walls that don’t need extra geometry. For high-resolution renders, you can add more detail, but even then, clean topology makes it easier to add textures and render the model without errors.
Refine and Validate Your Model for Its End Use
Once you’ve finished shaping your model, the next step is to refine it and test that it works for its intended purpose. This step separates amateur models from professional ones, and it’s where you catch small errors that could ruin your final result.
Add and optimize textures and materials
Textures and materials bring your 3D model to life by adding color, surface detail, and reflectivity. Even a perfectly modeled object will look flat and boring without the right textures. The process for texturing depends on your end use: for real-time games, you’ll use UV unwrapping to map 2D texture images to your 3D mesh, and you’ll keep texture resolutions low enough to run on target hardware (usually 1K to 4K resolution for most modern games). For high-resolution renders, you can use higher resolution textures and physically based rendering (PBR) materials to get photorealistic results that accurately mimic how real materials like wood, metal, or fabric interact with light.
A common mistake new designers make is using too many high-resolution textures when they don’t need them. A 8K texture for a small background prop that’s only on screen for a few seconds wastes memory and slows down your project. Always match your texture resolution to the model’s importance and end use.
Test for your specific use case
Every end use requires different testing to make sure your model works as intended. Below are the most common tests for popular use cases:
- 3D printing and manufacturing: Run a mesh check to confirm your model is watertight (no holes in the outer mesh) and has uniform wall thickness between 1.5mm and 3mm for most plastic 3D printing. Import your model into a slicer program to check for errors before you send it to print, and print a small low-resolution prototype first to test fit and function.
- Real-time games and interactive experiences: Import your model into your game engine and check the polygon count and texture memory usage. Test how it runs on your target hardware (for example, a mid-range mobile phone if you’re building a mobile game) to confirm it doesn’t lower frame rates below 30 FPS. Test deformations and animations if your model is rigged to make sure it doesn’t twist or glitch when it moves.
- Architectural visualization and client presentations: Test your model in your rendering software with the correct lighting conditions to confirm all surfaces render correctly and there are no missing faces or transparency errors. Check that all real-world dimensions match the architectural plans to avoid misleading clients.
For example, if you’re designing a custom 3D printed chess set, printing a single test pawn first will let you catch errors like walls that are too thin or a base that’s too small to stand up on its own before you print the entire set. That one small test saves you time and material cost in the long run.
Iterate based on feedback
Even the most experienced designers don’t get it right on the first try. Show your work to other people—whether that’s a client, a fellow designer, or a user in your target audience—and ask for honest feedback. A fresh pair of eyes will catch proportion errors or texture issues you didn’t notice after working on the model for hours. Prioritize changes that impact the model’s function first, then make aesthetic tweaks to improve the final result.
Conclusion
Learning how to design 3D models is a process that takes practice, but it doesn’t have to be overwhelming. By starting with clear planning, choosing the right workflow for your project, following core principles of clean geometry and proportion, and testing your model for its intended use, you’ll create high-quality models that work exactly as they’re supposed to. The most important habit to build is focusing on function first: a well-designed 3D model isn’t just the one that looks the most detailed—it’s the one that fits its purpose perfectly. As you practice, you’ll develop your own workflow and find what works best for your projects, whether you’re designing game assets, 3D printed products, or architectural visualizations.