
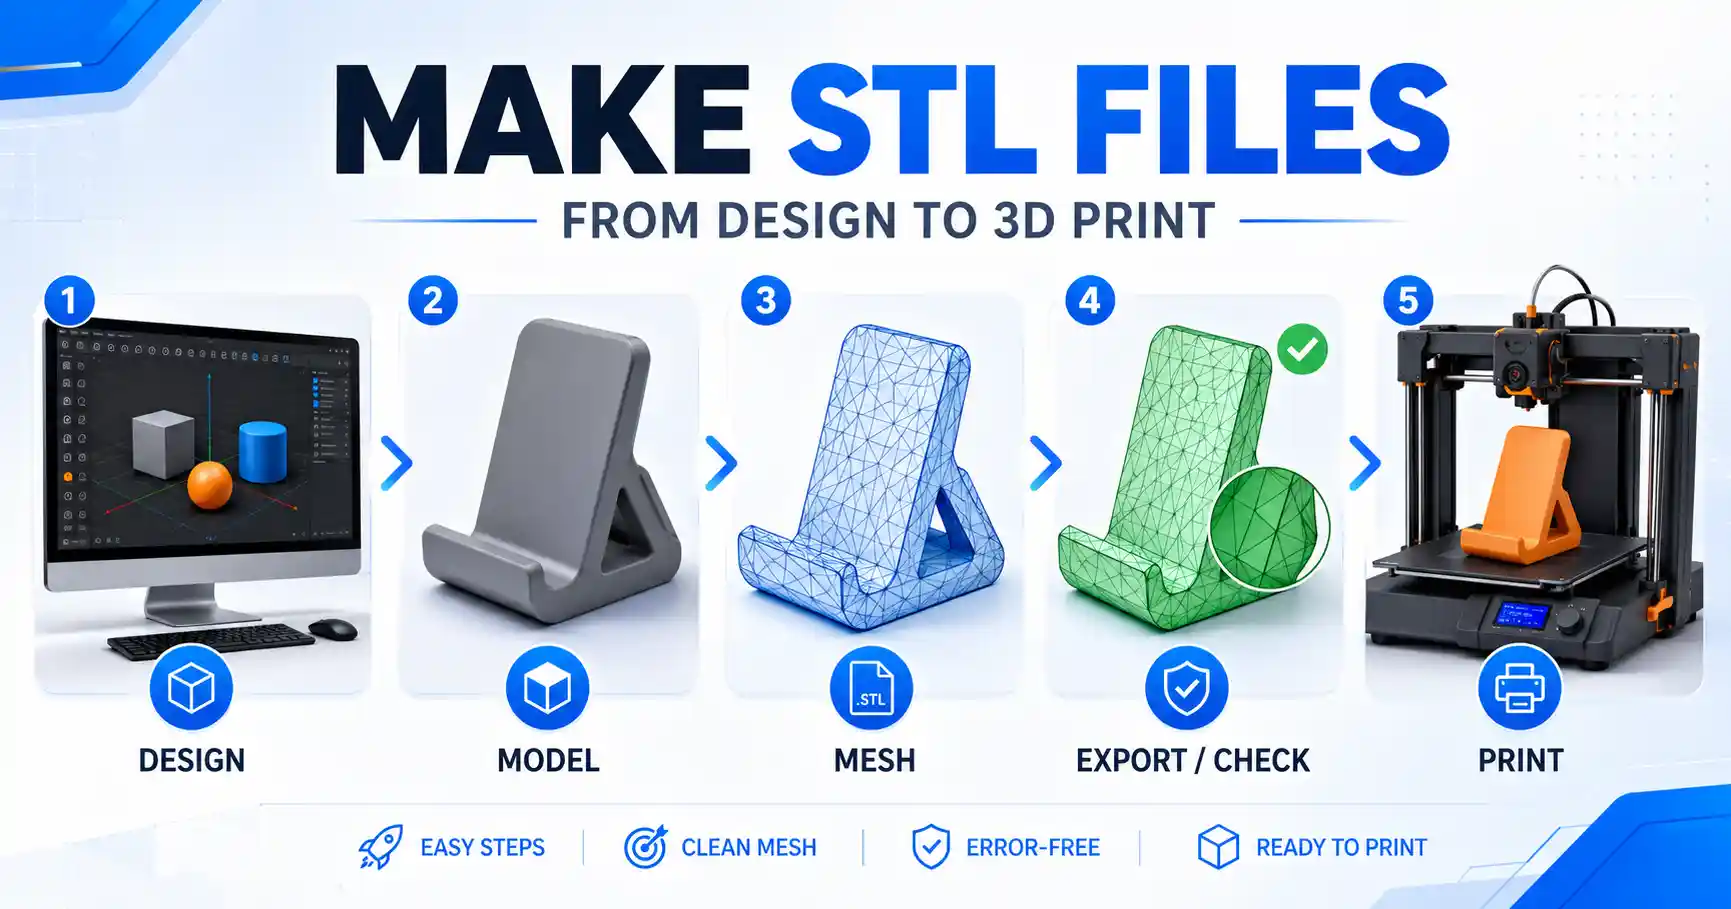
If you’ve ever dipped your toes into 3D printing, laser cutting, or CNC machining, you’ve almost certainly encountered an STL file. Short for Standard Tessellation Language, STL is the universal file format that describes the 3D surface geometry of a physical object, turning a digital idea into something you can hold in your hand. For new makers, creating an STL from scratch can feel intimidating—especially if you’ve only ever downloaded pre-made files from sites like Thingiverse or MyMiniFactory. But with the right tools and a step-by-step approach, anyone can learn to make custom STL files that match their exact needs, whether you’re designing a replacement phone case, a custom toy part, or a one-of-a-kind piece of home decor. This guide breaks down everything you need to know, from choosing the right software to troubleshooting common errors that can ruin a 3D print.
Understanding What an STL File Actually Is
Before you start creating your first STL, it helps to understand what the file does (and what it doesn’t do). Unlike native 3D design files saved from software like Blender or Fusion 360, STL files don’t store information about colors, textures, or assemblies—they only describe the outer surface of a 3D object as a mesh of interconnected triangles. This simplification is exactly why STL became the industry standard: it’s small, easy to share, and compatible with nearly every consumer and industrial 3D printer on the market.
Each triangle in the STL mesh is defined by three vertices (corner points) and a normal vector that tells the printer which side of the triangle is the outside of the object. The number of triangles used determines the resolution of your model: a small, simple object might only need a few hundred triangles, while a highly detailed figurine could use hundreds of thousands. Too few triangles, and your model will come out blocky with visible faceted edges; too many, and the file size will bloat, leading to longer slicing times and potential crashes on your 3D printer.
It’s important to distinguish STL from other common 3D file formats to avoid confusion. Formats like OBJ or GLB support textures and multiple materials, making them better for animation or graphic design, but most consumer 3D printers still require STL for basic printing. Native CAD (computer-aided design) files like STEP or F3D retain editable features like holes, fillets, and extrusions, but they’re too large and complex for most slicer software to process directly. When you export an STL from your native design, you’re essentially converting that editable model into the simplified mesh your printer needs.
Choosing the Right Software for Making STLs
The first step to making an STL file is picking design software that matches your skill level, project type, and budget. There is no one “best” option—what works for a professional engineer designing a functional machine part won’t work for a hobbyist making a custom keychain. Below, we break down the most popular options by category to help you choose.
Beginner-Friendly Free Options
If you’re new to 3D design and don’t want to invest money before learning the basics, there are several excellent free tools that can export high-quality STL files. Many of these are browser-based, so you don’t even need to download anything to get started.
- Tinkercad: This browser-based tool from Autodesk is the gold standard for total beginners. It uses a simple “block” building approach: you combine basic shapes (cubes, spheres, cylinders, holes) to build more complex objects. It’s perfect for simple functional parts, keychains, or custom logos, and it exports STL with one click. Best of all, it’s 100% free for personal use, and it runs on any laptop or Chromebook.
- SketchUp Free: Another browser-based option, SketchUp Free is popular with hobbyists who want a bit more flexibility than Tinkercad. It’s especially good for architectural models, furniture, and other large objects, and it has a large community that shares pre-made components you can adapt. The free version exports STL files, though you’ll need a plugin for older desktop versions.
- Meshmixer: If you’re more interested in modifying existing 3D models than building from scratch, Autodesk Meshmixer is a free, powerful tool for editing meshes and exporting STLs. It’s great for combining multiple models, hollowing out objects to save filament, or fixing errors in downloaded STLs before printing.
Mid-Range Options for Hobbyists
Once you outgrow beginner tools, mid-range options offer more features without the high price tag of professional CAD software.
- Fusion 360: Autodesk Fusion 360 is the most popular choice for serious hobbyists and small business designers. It combines solid modeling, mesh editing, and even assembly design in one package, and it’s free for qualifying hobbyists and startups making less than $100,000 per year in revenue. It’s great for both functional parts and organic designs, and exporting STL is straightforward. The learning curve is steeper than Tinkercad, but there are thousands of free tutorials online to help you learn.
- Blender: If you want to create highly detailed organic models like figurines, sculptures, or character models, Blender is the go-to free option. It’s primarily designed for 3D animation, but it has powerful mesh modeling tools that let you sculpt incredibly detailed designs. Blender does have a steep learning curve, and it requires a bit more work to get a 3D-printable STL out of it, but it’s 100% free and incredibly powerful.
Professional Options for Advanced Users
For engineers, industrial designers, or anyone needing precision for functional parts, professional CAD tools offer exact dimension control and advanced feature sets.
- SolidWorks: The industry standard for mechanical engineering, SolidWorks is used by millions of professionals to design precision parts. It has extensive parametric modeling tools that let you easily edit dimensions and features, and it exports clean, error-free STL files. It’s expensive (hundreds of dollars per month for a license), but it’s the best option for high-precision functional parts.
- Onshape: A cloud-based alternative to SolidWorks, Onshape offers professional-level CAD tools with a pay-as-you-go pricing model. It’s great for teams that need to collaborate on designs, and it exports STL files just like desktop CAD tools.
Step-by-Step: Creating Your First STL From Scratch
To make the process concrete, let’s walk through creating a simple, functional STL using Tinkercad—one of the most accessible tools for beginners. The core principles here translate to almost any other design software, so even if you’re using Fusion 360 or Blender, you’ll be able to adapt these steps.
Step 1: Set Up Your Workplane and Units
First, create a free account and start a new design. Tinkercad automatically drops you into a workplane, which is the virtual “build plate” where you’ll design your object. Before you start adding shapes, set your units to match what you’ll use for 3D printing. For most makers, millimeters (mm) are standard, as 3D printer slicers almost always use mm by default. Using inches by mistake will leave you with a tiny 1/25th-sized version of your design when you go to print, so this step is easy but critical.
Step 2: Build Your Model Basic Shapes
For this example, we’ll design a simple custom phone stand. Start by dragging a box shape from the basic shapes menu onto the workplane. Use the inspector panel to set the dimensions: we’ll make the base 100mm long, 60mm wide, and 10mm thick. Next, drag a second box onto the workplane for the backrest, set it to 80mm tall, 60mm wide, and 10mm thick, and move it to the back edge of the base. Tinkercad automatically snaps shapes together, but you can use the arrow tools to nudge it into place if needed.
To add the angle for your phone, select the backrest box and use the rotate tool to tilt it back 15 degrees. Now, add a notch for your charging cable: drag a cylinder shape onto the workplane, resize it so it’s 10mm in diameter (wide enough for most USB-C cables) and slightly taller than the base’s 10mm thickness. Move the cylinder to the center of the base, right where it meets the backrest. Then, change the cylinder’s setting from “Solid” to “Hole” in the inspector panel. Select both the base and the cylinder, click “Group,” and Tinkercad will cut the hole out of the base, leaving the cable notch.
The most common mistake new designers make is overcomplicating their first project. Start with something small and functional, like a keychain or a cable organizer, before moving on to large, complex models. This lets you learn the tools without getting frustrated by errors that are hard to fix.
Step 3: Check for Errors and Common Problems
Before you export your STL, you need to check for issues that will cause problems when you slice or print your model. For simple models like this phone stand, there are three main things to check:
- Check for non-manifold geometry: This is a fancy term for any errors in the mesh where the surface doesn’t properly define an inside and outside. Common issues include overlapping shapes, missing faces, or edges connected to more than two faces. In Tinkercad, grouping shapes automatically fixes most of these issues, but it’s still good to check. For more complex software, you can run a built-in mesh check to find errors.
- Check wall thickness: All parts of your model need to be thick enough for your 3D printer to print. Most FDM 3D printers can’t print walls thinner than 1.2mm, so make sure every part of your model is at least that thick. For our phone stand, the 10mm base and 10mm backrest are more than thick enough, but if you were designing a thin decorative sign, you’d need to make sure the edges aren’t too thin.
- Check for open edges: Your model needs to be a closed solid to print correctly. If any faces are missing, the slicer won’t know where the outside of the object is, and it will fail to generate a print path. Most beginner tools automatically close solid shapes, but it’s good to double-check by rotating your model around and looking for any gaps.
Step 4: Export Your STL File
Once you’re happy with your design and have checked for errors, it’s time to export. In Tinkercad, this is as simple as clicking the “Export” button in the top right corner, then selecting “STL” from the menu options. The software will automatically generate the STL mesh from your design, and download it to your computer.
When you export from more advanced software, you’ll usually get to choose the resolution or tolerance of your STL. This controls how detailed the triangle mesh is. For most hobbyist 3D printers, a tolerance of 0.1mm to 0.5mm is perfect. If you’re exporting a highly detailed model, you can use a lower tolerance (higher resolution) for smoother surfaces, but avoid going below 0.01mm—this will just create a massive file with no tangible benefit for print quality.
Creating STLs From Existing Models or 3D Scans
You don’t have to build your STL from scratch. Many makers create STLs by modifying existing designs or scanning physical objects to turn them into digital models. This is a great way to create a custom STL without starting from a blank canvas.
Modifying Existing 3D Models
If you find an existing model that’s almost what you want, but not quite, you can easily edit it and export a new STL. For example, you might want to resize a model to fit your printer, add a custom logo to a keychain, or cut a model in half to print it in two pieces.
For simple edits like resizing or cutting, free tools like Meshmixer or Tinkercad work great. Tinkercad even lets you import existing STL files and edit them by adding or subtracting shapes. For more complex edits, Fusion 360 can import STLs and convert them to editable solids (though this works best for simple models), and Blender gives you full control over editing individual triangles and vertices in the mesh.
Just remember to check the license of the original model before you share or sell your modified version. Most models on sites like Thingiverse are released under creative commons licenses that allow non-commercial modifications, but some require attribution or prohibit commercial use, so always double-check.
Creating STLs From 3D Scans
If you want to turn an existing physical object into a 3D-printable STL, you can do that with 3D scanning. Consumer 3D scanning technology has come a long way in the last few years, and you can even get decent results using just your smartphone.
The basic process for 3D scanning is simple:
- Take multiple photos of the object from every angle (or use a dedicated 3D scanner to capture the surface geometry).
- Use scanning software to stitch all the photos or scan data together into a 3D mesh.
- Clean up the mesh to fill in holes, remove extra geometry, and fix errors.
- Export the cleaned-up mesh as an STL file.
For smartphone scanning, free apps like Polycam work well for small to medium-sized objects. They use photogrammetry, a process that uses parallax from multiple photos to calculate the 3D shape of the object. For higher quality scans, you can buy a dedicated consumer 3D scanner like the EinScan-SE, which costs a few hundred dollars and produces much more accurate results than a phone app.
The biggest challenge with 3D scanned STLs is cleaning up the mesh. Scans almost always have errors like holes, extra floating geometry, or bumpy surfaces, so you’ll need to clean them up before you can print them. Tools like Meshmixer, Blender, or MeshLab are all designed for this kind of mesh editing, and they let you fill holes, smooth surfaces, and reduce the number of triangles to create a clean, printable STL.
Troubleshooting Common STL File Problems
Even experienced designers run into issues with STL files that cause printing errors. Knowing how to fix these common problems will save you hours of frustration and failed prints.
Non-Manifold Geometry
Non-manifold geometry is the most common problem with STL files. It happens when the mesh doesn’t form a closed, solid object—usually from overlapping triangles, missing faces, or edges that are shared by more than two faces. Most slicers will try to fix minor non-manifold errors automatically, but major errors will cause the slicer to crash or generate a bad print path.
Fortunately, there are free online tools like Mesh Repair that can automatically fix most non-manifold errors. Just upload your STL, click repair, and download the fixed version. For more complex errors, you can open the STL in Meshmixer or Blender and use the built-in repair tools to fix the problem manually.
Hollow or Incomplete Models
If your model has gaps or missing faces, it will appear hollow in the STL, and the slicer won’t be able to generate a solid part. This is especially common with 3D scanned models, where the scanner can’t capture every angle of the object. To fix this, use the “fill holes” tool in Meshmixer or MeshLab to automatically close any gaps in the mesh. For large gaps, you may need to add new faces manually in Blender.
Overly Large File Size
If you export a model with too high a resolution, you’ll end up with an STL file that’s hundreds of megabytes large, which can cause your slicer to crash or take hours to process. To fix this, you can reduce the number of triangles in the mesh without losing much visible detail. Most mesh editing tools have a “decimate” or “reduce” tool that automatically removes unnecessary triangles. As a general rule, keep your STL files under 50MB for most consumer 3D printers—anything larger than that is usually overkill.
Incorrect Units or Scale
It’s extremely common for new designers to export an STL with the wrong scale: a phone stand that should be 100mm wide ends up 10mm wide because the designer used inches instead of millimeters. Most slicers let you resize the model before printing, but it’s better to fix it before you export. If you do end up with the wrong scale, you can import the STL back into your design software, resize it to the correct dimensions, and re-export it.
Conclusion
Learning to make your own STL files opens up a whole new world of possibilities for 3D printing and digital fabrication. Instead of settling for pre-made designs that don’t fit your needs, you can create exactly what you want, from a custom replacement part for an old appliance to a one-of-a-kind gift for a friend. The process doesn’t have to be complicated: start with a simple project, use a beginner-friendly tool like Tinkercad to learn the basics, and work your way up to more complex designs as you get comfortable. Whether you’re building from scratch, modifying an existing model, or scanning a physical object, the core principles are the same: focus on creating a clean, closed mesh with the right dimensions and resolution, and you’ll end up with an STL that prints perfectly every time. With a little practice, you’ll be designing custom STLs like a pro in no time.