
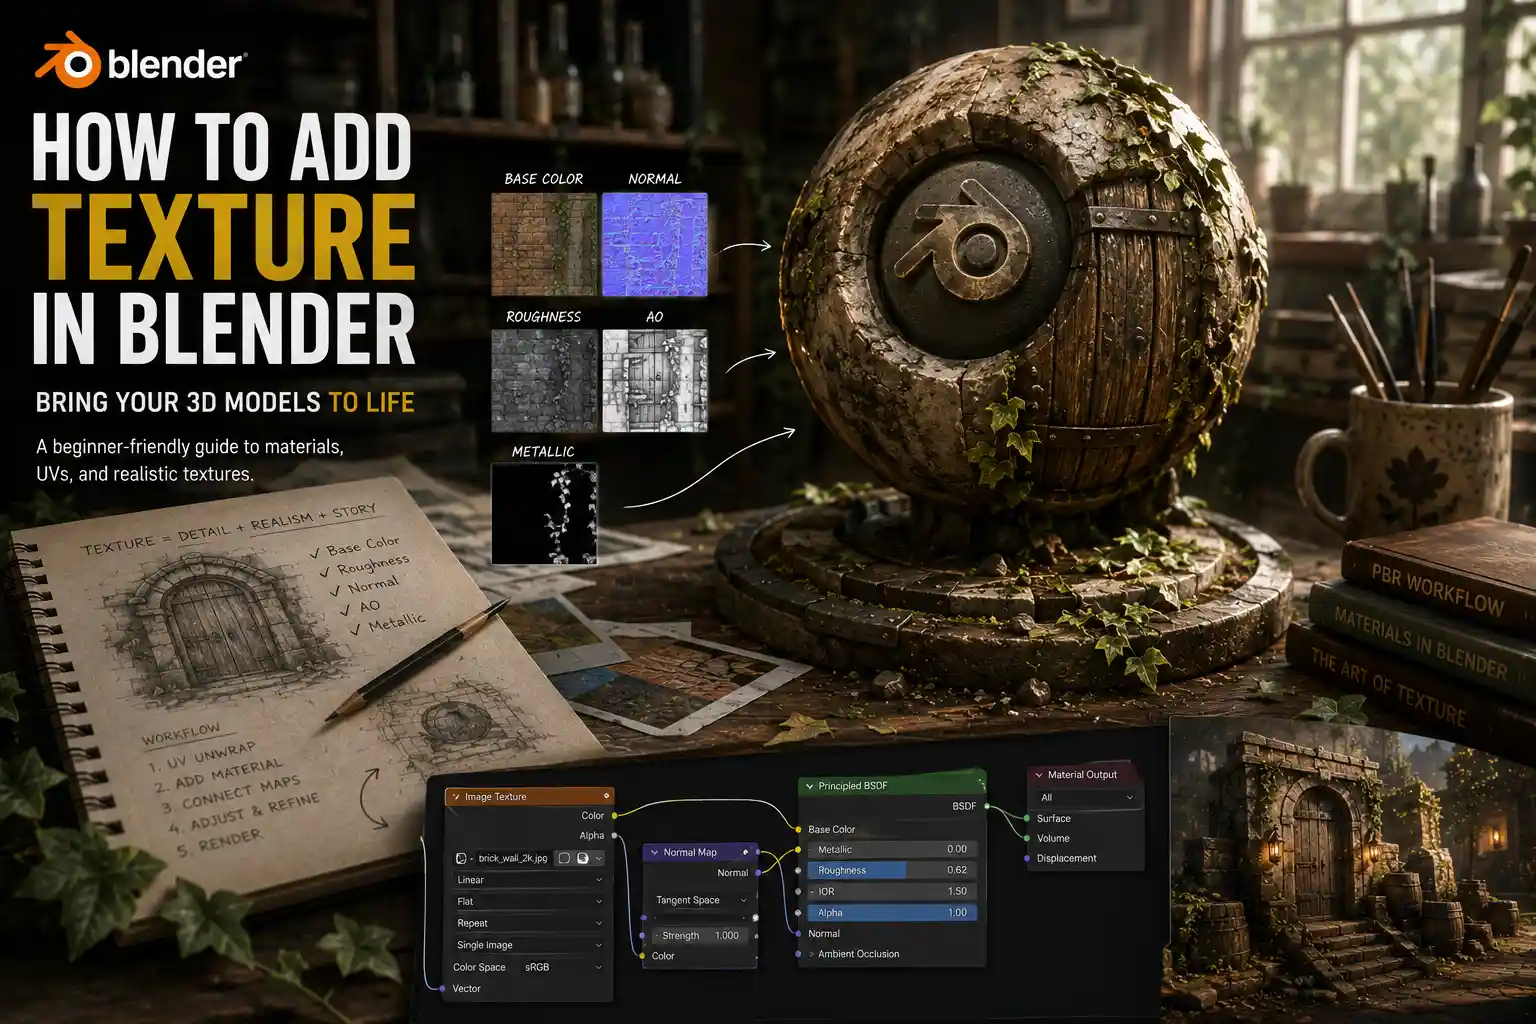
If you’ve ever spent hours sculpting a perfect 3D model in Blender, only to end up with a flat, lifeless render that looks more like a plastic toy than a real-world object, you’re not alone. Many new 3D artists focus all their energy on modeling and overlook one of the most critical elements of realistic design: texture. Texture turns a generic wooden table into a worn, scuffed antique, a plain stone wall into a weathered ruin, and a smooth character skin into something that looks alive and breathable. Blender offers a huge range of tools for adding texture, from simple built-in generators to complex photogrammetry-based workflows, so whether you’re a complete beginner or a hobbyist looking to level up your skills, there’s a method that fits your project. In this guide, we’ll break down the most common approaches to adding texture in Blender, step by step, so you can bring any 3D model to life.
Understanding the Basics: What Textures Do in Blender
Before diving into the step-by-step process, it helps to understand exactly what textures do and how they work in Blender’s shader system. At its core, a texture is a 2D image or procedural pattern that wraps around your 3D model to modify its surface properties. Textures don’t just change color – they can control how rough or smooth a surface is, how much light it reflects, whether it has bumps or dents, and even how transparent it is. Blender uses a node-based shader system in the Shader Editor, which lets you mix and match different textures to create complex, realistic surfaces.
There are two main categories of textures you’ll work with in Blender: image-based textures and procedural textures. Image-based textures are pre-made 2D image files that you import into Blender and wrap around your model. These are often sourced from free texture libraries, scanned from real objects, or painted by hand. Procedural textures, by contrast, are generated mathematically within Blender, so they don’t require any external image files. They’re infinitely adjustable and don’t have resolution issues, so you can zoom in as close as you want without seeing pixelation.
Common Texture Map Types
No matter what type of texture you use, you’ll work with different texture maps that each control a different property of your surface. Understanding what each map does is key to getting realistic results:
- Base Color (Albedo): This map defines the base color of your surface. For a brick wall, this would show the red of the bricks and the gray of the mortar. It doesn’t include any lighting or shading information – just the pure color of the material.
- Normal Map: This adds small bumps and dents to your surface without actually changing the geometry of your model. It’s a huge performance saver, because you can add detailed grain or scratches without having to model every detail by hand.
- Roughness: This controls how rough or glossy a surface is. A value of 0 (black on the roughness map) is completely shiny like glass or polished metal, while a value of 1 (white) is completely matte like uncoated paper or raw concrete.
- Metallic: This defines whether a surface is metal or non-metal. Most PBR (physically based rendering) workflows use a map where white is fully metallic, and black is fully non-metallic.
- Ambient Occlusion: This darkens crevices and tight gaps where light would naturally be blocked, adding depth and realism to your model.
Most modern textures, especially those downloaded from free PBR texture libraries, come with all of these separate maps ready to plug into Blender’s shader nodes.
Preparing Your Model for Texturing: UV Unwrapping Explained
Before you can add any image-based texture to your model, you need to unwrap its UVs. UV unwrapping is the process of flattening your 3D model into a 2D plane so Blender knows how to wrap your 2D texture image around the 3D surface. Think of it like unwrapping a birthday present to lay the wrapping paper flat: each point on the 2D wrapping paper (your texture) is mapped to a specific point on the 3D box (your model). If your UVs are messy or stretched, your texture will look distorted no matter how good the original image is.
Step-by-Step Basic UV Unwrapping
For beginners, Blender’s automatic UV unwrapping tools work well for most simple models. Follow these steps to get a clean unwrap:
- Switch to Edit Mode by pressing Tab, select all of your model’s faces by pressing A, and make sure you’re in Face Select mode by clicking the face icon in the top left of the 3D Viewport.
- Go to the UV menu at the top of the screen and select Smart UV Project. This is Blender’s automatic unwrapping tool that splits your model into logical pieces to minimize stretching.
- Adjust the Island Margin setting. This controls how much space is left between different pieces of your UV map (called islands). A margin of 0.02 to 0.05 works for most projects – it prevents texture bleeding (where colors from one part of the map leak into another) without wasting too much space.
- Click OK, then open the UV Editor (drag a new panel from the edge of the screen and select UV Editor) to check your unwrap. You should see all your UV islands neatly arranged with no major stretching.
For more complex models, like characters or furniture with lots of curved surfaces, you may need to manually mark seams before unwrapping. Seams are edges that you tell Blender to cut along when flattening the model, similar to how a tailor cuts fabric to fit a garment. To mark seams, select the edges you want to cut in Edit Mode, right-click, and select Mark Seam. Once your seams are marked, you can run the regular Unwrap command instead of Smart UV Project for a more custom result.
Once your UVs are unwrapped, you’re ready to start adding textures. A common mistake new artists make is skipping UV unwrapping and jumping straight to texturing, only to end up with distorted, blurry results. Taking 10 minutes to get clean UVs will save you hours of frustration later.
Method 1: Adding Pre-Made Image-Based Textures (PBR Workflow)
The most popular way to add texture to a 3D model in Blender is using pre-made PBR texture sets. PBR, short for Physically Based Rendering, is a standard workflow that ensures your textures react to light the way real materials do. Thousands of free PBR texture sets are available online from sites like Poly Haven, TexturingXYZ, and FreepBR, so you can find a texture for almost any material without having to create it from scratch.
Importing and Setting Up PBR Textures
Once you’ve downloaded a PBR texture set and unwrapped your UVs, follow these steps to set up your texture in Blender:
- Switch to the Shading workspace from the top menu bar. This will open the Shader Editor where you can edit your material nodes. By default, you’ll see a single Principled BSDF node connected to a Material Output node – this is Blender’s default physically based shader, and it’s what you’ll use for almost all projects.
- To add each texture map, press Shift+A in the Shader Editor, hover over Texture, and select Image Texture. Do this for each map in your PBR set (usually Base Color, Normal, Roughness, Metallic, and Ambient Occlusion).
- For each Image Texture node, click the Open button and select the corresponding image file from your downloaded texture set. For the Base Color map, make sure the Color Space setting (in the Properties panel on the right) is set to sRGB – this ensures colors display correctly. For all other maps (Normal, Roughness, Metallic, etc.), set Color Space to Non-Color, because these maps store data, not color information.
- Connect the output of each Image Texture node to the corresponding input on the Principled BSDF node:
- Base Color image → Base Color input
- Normal image → Normal input (you’ll need to add a Normal Map node between the Image Texture and the Principled BSDF: add it with Shift+A > Vector > Normal Map, then connect the image output to the Normal input of the Normal Map node, and the Normal output of the Normal Map node to the Normal input of the Principled BSDF)
- Roughness image → Roughness input
- Metallic image → Metallic input
- To add ambient occlusion, connect the ambient occlusion image output to a Multiply node (Shift+A > Color > Multiply), place the Multiply node between the Base Color image output and the Base Color input of the Principled BSDF, and adjust the factor to your liking to darken crevices.
That’s all it takes to set up a basic PBR texture. Once everything is connected, you can switch to Rendered view (press Z and select Rendered) to see how your texture looks with Cycles or Eevee rendering.
Good texturing isn’t about piling on as much detail as possible. It’s about matching the texture to the story your model is telling. A brand new axe doesn’t need deep scratches and chipped paint – that texture belongs on an axe that’s been left in a shed for 50 years.
If you want to adjust the scale of your texture (for example, if your brick texture is too large and you want more bricks per meter), you don’t need to go back and redo your UVs. Just add a Mapping node and a Texture Coordinate node between your Image Texture node and the Principled BSDF. Connect the UV output of the Texture Coordinate node to the Vector input of the Mapping node, then connect the Vector output of the Mapping node to the Vector input of your Image Texture node. You can then adjust the Scale values in the Mapping node to make your texture larger or smaller, which is much faster than re-unwrapping.
Method 2: Creating Procedural Textures Without External Images
If you don’t want to download pre-made textures, or you want a fully adjustable texture that never pixelates, procedural textures are the way to go. Procedural textures are generated entirely within Blender using mathematical algorithms, so you don’t need any external files, and you can tweak every detail to match your vision. They’re perfect for abstract models, organic shapes, and artists who want full control over their materials.
Basic Procedural Wood Example
To show how procedural texturing works, let’s walk through creating a simple worn wood material step by step:
- Start with the default Principled BSDF node in the Shader Editor. Add a Wood Texture node (Shift+A > Texture > Wood Texture) for the base grain pattern. By default, this creates a basic repeating wood grain.
- Add a Texture Coordinate node (Shift+A > Input > Texture Coordinate) and a Mapping node (Shift+A > Vector > Mapping). Connect the Generated output of the Texture Coordinate node to the Vector input of the Mapping node, then connect the Mapping node’s output to the Vector input of the Wood Texture node. Adjust the Scale of the Mapping node to around 2 to get a natural-sized grain pattern.
- To add color variation, connect the Color output of the Wood Texture node to the Color input of a MixRGB node. Set the MixRGB node to Multiply, and add two different brown colors to the input slots – one light brown for the raised grain and one dark brown for the grooves. Connect the output of the MixRGB node to the Base Color input of the Principled BSDF.
- To add roughness variation (which makes the grooves darker and rougher, just like real wood), connect the Color output of the Wood Texture node to the Roughness input of the Principled BSDF. Adjust the contrast of the texture by adding another Multiply node between them to get the right balance – rougher grooves and smoother raised grain look much more realistic than a uniform roughness.
- To add small scratches and wear, add a Noise Texture node (Shift+A > Texture > Noise Texture) scale it down to get small, irregular spots, and mix it into your base color and roughness to break up the repeating wood pattern. This breaks up the uniformity and makes the texture look more natural.
Blender comes with a range of built-in procedural textures to work with, including:
- Noise Texture: Creates irregular, organic patterns perfect for adding wear, dirt, or cloud-like variation
- Voronoi Texture: Creates cell-like patterns great for cracked stone, foam, or skin pores
- Musgrave Texture: Creates detailed fractal patterns perfect for terrain, organic surfaces, and rough cloth
- Checker Texture: A simple two-color pattern often used to check UV stretching, but also useful for tiled floors or checkerboard patterns
The biggest advantage of procedural textures is that they’re non-destructive and infinitely adjustable. If you decide you want a larger grain pattern after you’ve finished your material, you just move the scale slider – you don’t have to reimport a new image or redo any unwrapping. They also don’t require UV unwrapping at all, because they use the 3D coordinates of your model to generate the pattern, which saves time for quick projects or environment modeling. The main downside is that they can be more computationally intensive than image-based textures, and it takes practice to get realistic results that don’t look generic.
Method 3: Hand-Painting Textures Directly on Your Model
For custom models, characters, or stylized art, hand-painting your textures directly in Blender gives you full creative control. Blender has a built-in Texture Paint workspace that lets you paint directly onto your 3D model, so you can add custom details, logos, or artistic effects that would be hard to get from pre-made textures. It’s especially popular for indie game development and stylized 3D art.
Setting Up for Texture Painting
Before you start painting, you need to create a blank image to paint on, just like you need a blank canvas before you start painting with physical paints. Follow these steps to set up your canvas:
- Make sure your model is fully UV unwrapped first – just like with image-based textures, you need clean UVs to avoid stretching.
- Open the Texture Paint workspace from the top menu bar. In the Properties panel on the right, go to the Texture Paint tab and click New to create a new blank image. Set the size to 2048x2048 or 4096x4096 pixels (larger sizes give more detail but use more memory) and set the background to white or transparent, depending on your project.
- In the Shader Editor, add an Image Texture node, select your new blank image from the dropdown, and connect it to the Base Color input of your Principled BSDF node.
- Select a brush from the Brush menu on the left, adjust the size, strength, and color, and start painting directly on your model in the 3D Viewport. Blender will automatically project your brush strokes onto the 2D image based on your UV map.
You can paint multiple layers for different details – for example, you can paint a base coat of color on one layer, then add scratches and dirt on a separate layer so you can edit them without changing your base color. You can also use stencils to add repeating details like rivets, scratches, or logos, which speeds up the process a lot. Once you’re done painting, you can export your painted texture as a PNG image to use in other projects, or keep it in your Blender file for rendering.
For beginners, hand-painting is a great way to learn how texture interacts with 3D shape, because you can see how your changes affect the final model in real time. It’s also much more accessible than you might think – you don’t need a fancy graphics tablet to get good results, though a tablet does make it easier to create natural brush strokes. Even a basic mouse can be used to add simple custom details to your models.
Tips for Getting Realistic Texture Results
No matter what method you use to add texture to your model, these practical tips will help you get more realistic, professional-looking results:
Add Variation to Break Up Uniformity
Real-world materials are never perfectly uniform. A wooden table has darker stains where people have set their cups, a brick wall has loose dirt in some areas and clean brick in others, and even a brand new metal pan has tiny scratches and imperfections. Adding subtle variation with a noise texture or a light dirt overlay will make your texture look much more natural than a perfectly clean, uniform pattern. Even just adding 10% opacity noise to your roughness map will make a huge difference.
Match Texture Scale to Real World Units
A common mistake new artists make is using a brick texture where each brick is the size of a dinner plate, or a wood grain that’s 10 times larger than it should be. Blender works best when you model in real world units (meters or centimeters), so you can adjust your texture scale to match reality. If you’re not sure what size your texture should be, add a default 1m cube next to your model and adjust the texture until it looks correct compared to the cube. This small step will make your renders look much more believable.
Don’t Overdo the Detail
It’s tempting to add every possible scratch, dent, and imperfection to your texture, but too much detail can make your model look cluttered and unrealistic. Most fine detail only shows up when you’re very close to the model, so if your project is a wide shot of a house, you don’t need 4K detail on every single brick. Matching the level of detail to your camera distance saves time and keeps your render clean.
Use Ambient Occlusion to Add Depth
Even if your texture set doesn’t come with an ambient occlusion map, adding a quick baked ambient occlusion pass to your base color will add depth to crevices and make your model feel more grounded. You can bake ambient occlusion directly in Blender in just a few minutes, and it makes a huge difference in how realistic your final render looks.
Conclusion
Adding texture to a 3D model in Blender doesn’t have to be complicated. Whether you prefer the speed of pre-made PBR textures, the flexibility of procedural textures, or the creative control of hand-painted textures, there’s a workflow that fits your project and skill level. The key is to start with the basics: get clean UV unwraps for image-based textures, understand what each texture map does, and don’t be afraid to experiment with different settings. Remember that texture is what tells the story of your model – a worn, scuffed texture tells a very different story than a clean, new one, so always match your texture choices to the purpose of your design. With practice, you’ll be able to turn even the simplest 3D model into a realistic, engaging render that stands out.