
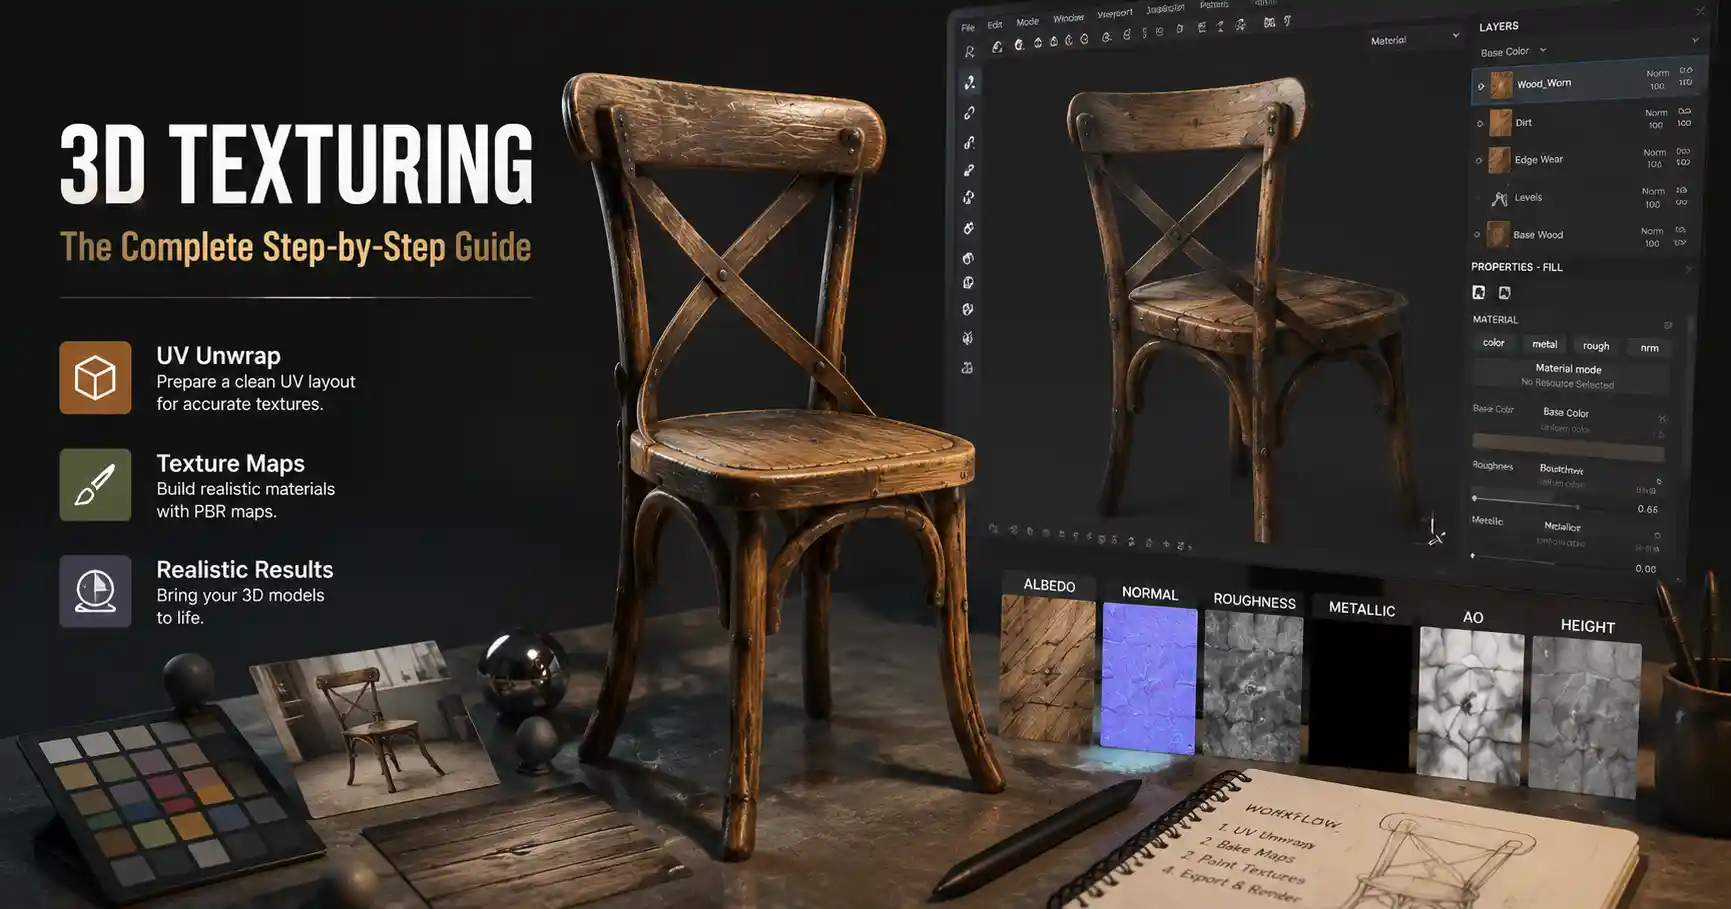
Plain 3D models can look like lifeless plastic blobs, no matter how perfectly their geometry is modeled. Texture is what turns a basic shape into a weathered wooden chair, a rusted metal pipe, or a skin-like character face that feels alive. Whether you’re designing for video games, animated films, 3D printing, or architectural visualization, mastering texture work is the difference between a model that looks professional and one that feels amateurish. This step-by-step guide breaks down everything you need to know to add believable, high-quality texture to any 3D model, regardless of your skill level or the software you use.
Understand the Basics of 3D Texturing Before You Start
Before you open your 3D software and start painting, it’s important to build a foundational understanding of how 3D texturing works. Texturing is more than just pasting a photo of wood onto a cube; it’s a layered process that combines multiple maps to define how a surface looks, reacts to light, and interacts with its environment. Even if you’re using a free tool like Blender or a paid platform like Substance Painter, these core concepts apply across every workflow.
What is UV Unwrapping, and Why Does It Matter?
Before you can add any texture to a 3D model, you need to unwrap its UVs. A 3D model exists in three-dimensional space, but texture maps are two-dimensional images. UV unwrapping is the process of flattening the 3D mesh into a 2D template, similar to how you’d flatten a cardboard box to trace its pattern onto a piece of wrapping paper. The U and V coordinates simply refer to the horizontal and vertical axes of the 2D texture image.
Poor UV unwrapping leads to obvious texture stretching, seams where parts of the model meet, and distorted details that break immersion. For example, if you’re texturing a human head and you pack the UV for the forehead too tightly compared to the cheeks, any wrinkles or pores you add will look stretched and unnatural on the forehead. Most modern 3D software has automatic UV unwrapping tools, but for high-quality work, you’ll still want to manually adjust seams to hide them in less visible areas, like the back of a character’s head or under the arm of a chair.
Common Texture Maps You’ll Use Every Time
Modern texturing relies on multiple different texture maps, each responsible for a specific property of the surface. Understanding what each map does will help you build more realistic textures from the start. The most common maps include:
- Albedo (or Base Color) Map: This is the base color of your texture, without any lighting or shadow information. For a brick wall, this map would define the red of the bricks and the gray of the mortar, with no added highlights or dark cracks.
- Normal Map: This map adds small surface details like bumps, scratches, and ridges without adding extra geometry to your model. A normal map uses RGB color values to fake how light interacts with small surface variations, making a low-polygon model look far more detailed than it actually is.
- Roughness/Glossiness Map: This defines how shiny or matte a surface is. A clean piece of glass will have a very low roughness value (near 0, meaning fully glossy), while a piece of felt will have a very high roughness value (near 1, completely matte). For a worn steel knife, you’d set the blade to be less rough (more shiny) and the handle to be more rough (more matte).
- Metallic Map: This map tells the render engine which parts of the model are metal and which are non-metal. Most workflows use a grayscale map where pure black is non-metal and pure white is fully metallic. For a brass doorknob on a wooden door, the doorknob would be white and the door would be black.
- Ambient Occlusion (AO) Map: This adds subtle darkening to crevices, cracks, and areas where two objects meet, mimicking how light gets trapped in real-world surfaces. AO adds a huge amount of depth and realism to a model with very little effort.
- Height/Displacement Map: Similar to a normal map, this adds depth to a surface, but unlike a normal map, it actually changes the geometry of the model at render time. Displacement maps are used for large, deep details like terrain or carved wood, while normal maps handle smaller details.
Getting comfortable with these core maps will make every texturing project faster and more consistent, regardless of which workflow you choose.
Choose the Right Workflow for Your Project
There are three main texturing workflows used by 3D artists today, and each is better suited for different types of projects and skill levels. Choosing the right workflow before you start will save you hours of rework later.
Photogrammetry and Texture Photography
Photogrammetry is the process of creating a 3D model and its matching textures by taking dozens or hundreds of photos of a real object from different angles. Software like RealityCapture or Agisoft Metashape processes the photos to generate both the mesh and a fully automatically generated set of texture maps. If you don’t have access to photogrammetry gear, you can also source high-quality photos of real surfaces (brick, wood, concrete, etc.) from free or paid stock sites like Poly Haven, TexturingXYZ, or Pexels, and compile them into custom texture sets.
This workflow produces incredibly realistic results, because the texture is captured directly from the real world. It’s ideal for architectural visualization, game environments, and prop work where you need authentic surface variation. The downside is that it can be less flexible for stylized projects or fully custom assets, and you’ll often need to edit the captured texture to fix lighting inconsistencies or remove unwanted details.
Procedural Texturing
Procedural texturing uses algorithms and node-based systems to generate textures mathematically, rather than using pre-made image files. Software like Blender’s Shader Editor, Substance Designer, or Houdini lets you connect nodes that add noise, patterns, scratches, and color variation to create a fully adjustable texture. If you want a brick wall, you can adjust the size of the bricks, the amount of mortar, and the level of discoloration with a few sliders, instead of having to repaint an image.
One of the biggest advantages of procedural texturing is that it’s resolution-independent: you can scale the texture to any size without it getting pixelated. It’s also very flexible for iterative design, because you can tweak parameters at any time instead of starting over with a new image. Procedural texturing is great for background assets, stylized projects, and situations where you need to reuse textures across multiple assets. The learning curve can be steeper for beginners, though, because it requires understanding how different nodes interact to build up the final look.
Hand-Painted Texturing
Hand-painted texturing is exactly what it sounds like: you paint the texture directly onto the UV unwrapped model using a digital brush in software like Substance Painter, Photoshop, or Blender’s Texture Paint. This workflow gives you full creative control over every detail, making it ideal for stylized games, character art, and concept work. For example, hand-painting is the standard workflow for most indie adventure games and cel-shaded animated projects, where the art style requires a specific handcrafted look.
Hand-painting does require some traditional art skills to get good color, light, and shadow right, but modern software has lots of brushes and pre-made stamp assets to make the process faster. Even for realistic projects, many artists combine hand-painting with photo textures to add custom details that wouldn’t appear in a stock texture.
Good texturing isn’t about picking one workflow and sticking to it forever. The best artists combine all three: use procedural tools to generate a base pattern, add a photo texture for realistic surface detail, then hand-paint custom wear and tear to make the asset feel unique.
Step-by-Step: How to Add Texture to a 3D Model
Whether you’re working on a simple prop or a full character, this step-by-step process works for almost any project and any software. We’ll cover the core steps you can adapt to Blender, Substance Painter, Maya, or any other tool you use.
Step 1: Prep Your Model and UV Unwrap
Before you start texturing, clean up your 3D model. Delete any hidden faces, merge overlapping vertices, and fix any geometry errors that could cause issues when unwrapping. For most models, you’ll want to separate different materials onto different UV tiles, so a metal doorknob and a wooden door get their own UV space to work with.
Once your model is prepped, run the automatic unwrap tool in your software. Then manually adjust the result to fix stretching and hide seams. A good rule of thumb is to hide seams along hard edges or in areas that won’t be visible to the camera. For example, on a couch, you can put the seam where the cushions meet the frame, where it will be hidden by shadow. Finally, check your UV island packing: make sure you’re using the full 2D texture space without overlapping islands, so you get maximum detail out of your texture resolution.
Step 2: Block out Base Materials
Once your UVs are done, it’s time to add your base materials. Start with the albedo (base color) to block out the main areas of different materials. For a kitchen cabinet, that means one base color for the wood frame, a different one for the metal handles, and a third for the glass door. Don’t worry about adding detail at this stage — you just want to separate the different material zones.
Next, block out your other base maps. Set the handles to be metallic and low roughness (shiny), the wood frame to be non-metallic and medium roughness, and the glass to be non-metallic and very low roughness. Add a base ambient occlusion map to darken the corners where the frame meets the door, and where the handles attach to the wood. This base block-in gives you a foundation to build detail on top of.
Step 3: Add Surface Detail and Variation
Real-world surfaces are never perfectly uniform. A brand new wooden cabinet will have slight color variations in the grain, small knots, and tiny scuffs from manufacturing. An old cabinet will have deeper scratches, water stains around the handles, and chipped paint along the edges. This step is where you add that variation to make your texture feel believable.
Some common details to add at this stage include:
- Grunge and dirt in crevices and along the bottom of objects, where dust and grime accumulate over time
- Scratches and scuffs on high-touch areas like doorknobs, table edges, and tool handles
- Faded color in areas that are exposed to sunlight, like the top of an outdoor bench
- Chipped paint or finish where the object has hit hard surfaces, along corners or edges
- Natural pattern variation for materials like wood grain, brick, and stone
Most modern texturing software like Substance Painter has a huge library of smart materials and alpha brushes that let you add these details in seconds, instead of painting every scratch by hand. For example, a smart wood material will automatically add grain, variation, and wear based on the curvature of your model, so edges get more wear automatically.
Step 4: Bake Maps for High-Poly Details
If you’re working with a high-poly model (a version of your model with all the fine detail added as geometry) that you want to render as a low-poly model (for games or real-time visualization), you’ll need to bake your high-poly details down to texture maps for the low-poly model. Baking is the process of transferring detail from the high-poly mesh to the 2D texture maps of the low-poly mesh.
Common maps you’ll bake include normal maps, ambient occlusion maps, and curvature maps (which help define edges for adding wear). Most software has automated baking tools that do most of the work for you, but you’ll want to check for baking errors like artifacts or missing details around hard edges. Fixing these errors early saves you from having to rework your texture later.
Step 5: Export and Test Your Textures
Once you’re happy with your texture, export your maps in the correct file format and resolution for your project. For real-time use (like games or AR), you’ll usually export as PNG or JPEG files at a resolution like 2K (2048x2048) or 4K (4096x4096), depending on how close the camera will get to the model. For ray-traced renderings (like architectural visualizations or animated films), you can use higher resolutions if needed.
Always test your textured model in your target environment before you consider it finished. Put it in the scene where it will be used, test it under different lighting conditions, and check how it looks from different distances. A texture that looks great up close in Substance Painter might look muddy when placed in a full game scene, or it might look too shiny under the bright lighting of an architectural render.
Pro Tips for More Realistic, Professional Textures
Even if you follow the step-by-step process, small mistakes can make your textures look unpolished. These professional tips will help you take your texturing to the next level, regardless of your experience.
Always Add Wear and Tear
The most common mistake new 3D artists make is creating perfectly clean, uniform textures. No object in the real world is brand new and perfectly uniform for long. Even a new car has tiny micro-scratches on the paint from the factory, and a new shirt has small wrinkles and fabric variation. Adding subtle wear doesn’t take much time, but it makes a huge difference in how realistic your model feels.
You don’t have to overdo it, either. A few small scratches on high-contact areas and a little bit of dirt in the crevices is enough to break up uniformity. For larger assets, add uneven discoloration to mimic exposure to the elements or years of use.
Match Your Texture Resolution to Your Camera
Another common mistake is using too low of a texture resolution for a foreground object, or wasting memory on unnecessarily high-resolution textures for background objects. A character that’s going to be the main focus of a game cutscene needs a 4K or even 8K texture, so pores and fine wrinkles stay sharp when the camera is inches from their face. A tree that’s 100 meters in the background of a scene only needs a 512x512 or 1K texture, because the player will never see it close enough to notice the detail.
Most game engines and render engines let you use mip-mapping, which automatically lowers the resolution of textures when they’re far away, so matching resolution to the object’s importance helps keep your project running smoothly without losing quality.
Use Reference Images to Guide Your Work
Even the most experienced 3D texture artists don’t work from memory. If you’re texturing a rusted steel beam, pull up 10-20 photos of real rusted steel beams and study how the rust looks, where it accumulates, and what colors it is. Rust isn’t just orange — it has dark brown, red, and even black patches where it’s thicker, and it usually starts to form around scratches and joints where the protective paint has chipped away.
Reference images keep you from relying on generic, stereotypical textures that feel fake. Sites like Unsplash, Pexels, and Pinterest are great sources of free reference images, and you can even take your own photos of surfaces when you’re out and about to build a personal reference library.
Don’t Overdo the Detail
It’s easy to get carried away adding every possible scratch, pore, and stain to a texture, but too much detail can actually make your model look busier and less realistic than it would with more subtle variation. The human eye doesn’t notice every tiny detail on a surface unless it’s looking directly at it up close. Overloading a texture with detail can also make it harder for the render engine or game engine to process, and it can distract from the focal point of your scene.
A good rule of thumb is to focus detail on the areas that draw the viewer’s attention, and keep less important areas more subtle. For a character portrait, you can add lots of fine detail to the face, but keep the texture of their shirt simpler, because the viewer’s eye will be focused on their face.
Common Texturing Mistakes to Avoid
Even experienced artists make these common mistakes, and fixing them will instantly improve the look of your 3D models.
First, avoid adding shadows or lighting to your albedo map. Many new artists paint dark shadows into the base color of their texture, but this makes the texture inflexible — if you change the lighting in your scene, the baked-in shadow will look wrong. Always use separate AO or shadow maps that can be adjusted, and leave your albedo map just for base color.
Second, don’t ignore the importance of roughness and metallic maps. Most new artists focus all their attention on the albedo map and just use a uniform value for roughness and metallic, but those two maps have a bigger impact on realism than the albedo in many cases. A perfectly colored wood texture that uses a uniform low roughness value will look like plastic, not wood, because real wood is relatively matte.
Third, don’t leave obvious UV seams unaddressed. Seams where two UV islands meet are one of the easiest giveaways of an unpolished texture. Use the seam hide trick we mentioned earlier, and use texture filtering or soft editing to blend the edges of the islands together so the seam isn’t visible. Most modern texturing tools have automatic seam blending features that fix this issue in one click.
Fourth, don’t use too many repeating textures. Repeating a small brick texture across a whole building saves memory, but if the repetition is obvious, it will look fake. Break up the repetition by adding random color variation, grunge, and different decals (like posters or cracks) across the surface to make the pattern look less uniform.
Conclusion
Adding texture to a 3D model is a skill that improves with practice, but it doesn’t have to be intimidating. By starting with a solid foundation of UV unwrapping and understanding the purpose of different texture maps, choosing the right workflow for your project, and building up detail gradually, you can create professional, believable textures for any 3D asset. The core of good texturing is simple: observe how real surfaces look, add subtle variation and wear, and always test your work in the context of your final scene. Whether you’re a beginner working on your first 3D model or an experienced artist looking to refine your workflow, these steps will help you create textures that bring your 3D models to life.