
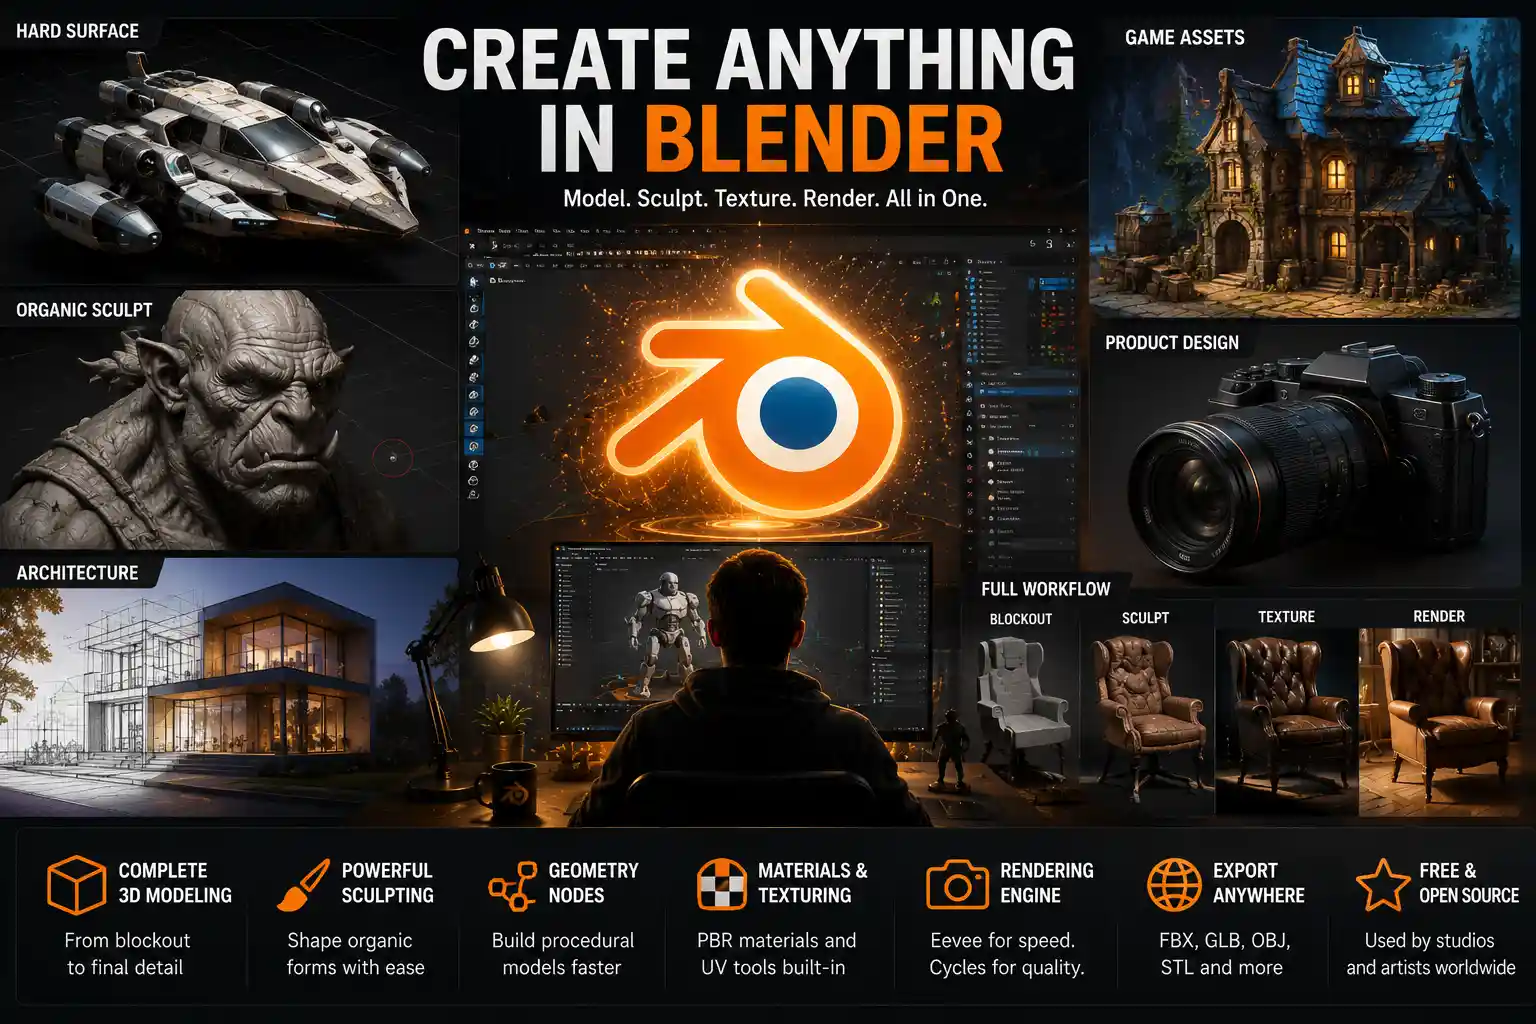
If you’ve ever scrolled through 3D animated short films, custom video game assets, or detailed product visualizations and wondered how creators bring those designs to life, chances are you’ve seen work made with Blender. As one of the most popular 3D creation tools on the market, Blender has a reputation for being powerful but intimidating to new users. A common question for anyone new to 3D design is simple: can you actually make complete, professional-quality 3D models in Blender? The short answer is yes—Blender is a fully featured open-source 3D creation suite that supports the entire 3D modeling workflow, from blocking out basic shapes to adding final textures and rendering. But to understand just how capable it is, we need to break down what Blender can do, who it’s for, and how it compares to other leading 3D tools on the market.
What Types of 3D Models Can You Create in Blender?
Blender’s flexible toolset supports almost every type of 3D modeling imaginable, from simple low-poly assets for indie games to hyper-realistic product models for commercial marketing. Unlike niche tools that are limited to specific use cases, Blender is built to handle every stage of 3D content creation, so you never have to export your work to another program just to finish a model. The scope of what you can build depends more on your skill level than the software’s limitations—many professional artists produce award-winning work entirely in Blender.
Hard-surface models
Hard-surface modeling is the process of creating solid, inorganic objects with clean edges, such as furniture, vehicles, machinery, architectural elements, and consumer products. Blender has a complete set of tools specifically designed for hard-surface work, including boolean modifiers for cutting shapes into existing geometry, bevel tools for adjusting edge sharpness, and the popular Knife Project tool for cutting custom outlines across multiple faces. For example, a 3D artist creating a custom 3D-printable model of a mechanical keyboard would use Blender’s hard-surface tools to block out each key, add screw holes, and adjust tolerances for printing—all without leaving the software. Many industrial designers and 3D printing enthusiasts prefer Blender for hard-surface work because it’s free to use and supports STL export, the standard file format for 3D printing.
Organic models
Organic modeling involves creating curved, natural shapes like characters, plants, animals, and terrain. Blender excels here thanks to its robust sculpting toolset, which lets artists shape 3D meshes like digital clay, with support for hundreds of thousands of polygons even on mid-range consumer hardware. For character artists, Blender includes automatic retopology tools to clean up high-poly sculpts into clean, animation-ready meshes, plus a built-in UV unwrapping tool to map textures onto the final model. In 2023, the animated short film Sprite Fright was created entirely in Blender, with every character, environment, and prop modeled and animated within the software—proving that Blender can handle even the most complex organic character work for professional productions.
Architectural and interior design models
Many architects and interior designers are turning to Blender to create conceptual design models and visualizations, thanks to its free license and powerful rendering tools. Blender supports importing CAD files from programs like AutoCAD and SketchUp, so designers can start with technical drawings and build out detailed 3D models of entire buildings or rooms. With add-ons like BlenderBIM, users can even work with open BIM (Building Information Modeling) data directly in Blender, making it a viable option for small architecture firms that can’t afford expensive proprietary BIM software.
Low-poly and game-ready assets
Blender has become the go-to tool for indie game developers creating game-ready 3D assets, because it supports all the features needed to create optimized models with clean topology, baked lightmaps, and correctly UV-mapped textures. It can export to all common game engine file formats, including FBX and GLB, which work natively with Unity, Unreal Engine, and Godot. A huge community of indie developers also creates free and paid add-ons for Blender that streamline game asset creation, from auto-LOD (level of detail) generators to tools that bake high-poly details into normal maps for low-poly models.
Core Blender Tools for 3D Modeling: A Practical Overview
To understand how Blender supports 3D modeling, it’s helpful to break down the core tools that artists use every day, and how they compare to tools in paid 3D software like Maya, 3ds Max, or ZBrush. Unlike many free 3D tools that only offer basic modeling features, Blender includes all the advanced functionality most artists will ever need, with regular updates that add new capabilities every few months.
Primary modeling workflows
Blender supports every common 3D modeling workflow, so artists can choose the method that works best for their project:
- Polygon modeling: The core workflow for most 3D modeling, where artists build up meshes by manipulating individual vertices, edges, and faces. Blender’s edit mode has all the standard tools for extruding, insetting, looping cutting, and welding geometry, with customizable keyboard shortcuts that speed up repetitive work.
- Sculpting: For organic shapes and high-poly details, Blender’s sculpt mode includes 20+ different brushes for pushing, pulling, smoothing, and carving details into meshes. It also supports dynamic topology, which automatically adds more geometry to the mesh as you sculpt, so you don’t have to worry about subdividing your model manually.
- Procedural modeling: Using Blender’s geometry nodes system, artists can create parametric 3D models that automatically adjust based on input values. For example, you can create a procedural tree that changes height, leaf count, and branch shape with a few slider adjustments, or a procedural building generator that creates entire city blocks in minutes.
- NURBS modeling: While Blender is primarily polygon-based, it does support NURBS (Non-Uniform Rational B-Splines) for precision modeling work that requires smooth, mathematically defined curves, making it suitable for some industrial design use cases.
Modifiers for non-destructive workflow
One of Blender’s most popular features for 3D modeling is its non-destructive modifier system. Modifiers are automatic operations that change the appearance of your 3D model without permanently altering the base geometry. For example, a subdivision surface modifier can smooth a low-poly base mesh into a high-resolution smooth shape, while a boolean modifier can cut a hole through a mesh without deleting or merging geometry permanently. If you decide you want to adjust the size of the hole later, you just move the cutting object instead of redoing the entire operation. This non-destructive workflow saves artists hours of time, especially when working on complex models that require multiple iterations.
Post-modeling tools to finish your model
Unlike some modeling tools that only let you create the base mesh, Blender includes all the tools you need to finish your 3D model in one place:
- UV unwrapping: Flatten your 3D mesh into a 2D template so you can apply custom textures.
- Texture painting: Paint colors, roughness, and other texture maps directly onto your 3D model.
- Shading: Create custom material shaders for everything from matte plastic to metallic car paint to translucent glass.
- Rendering: Produce high-quality final images or animations of your model with Blender’s built-in Cycles path tracer or the faster Eevee real-time renderer.
- Animation and rigging: If you’re creating a character model, you can rig it for animation and even animate it entirely within Blender.
"Blender didn’t just become popular because it’s free. It became popular because it’s actually better at many common 3D modeling tasks than the expensive paid tools most studios used for decades. Today, a new artist can start modeling in Blender with a $500 laptop and produce work that’s indistinguishable from work made in $2,000 a year subscription software."
— Ian McGlasham, Blender foundation instructor and professional 3D artist
Limitations of Blender for 3D Modeling: What You Need to Know
While Blender is extremely capable, it’s not the perfect tool for every use case. Understanding its limitations can help you decide if it’s the right choice for your specific project, or if you need to pair it with other software to get the result you want. Most of Blender’s limitations are specific to niche professional use cases, not general 3D modeling for art, games, or visualization.
Precision for industrial and mechanical engineering
Blender is not designed for highly precise technical modeling required for aerospace, automotive, or heavy mechanical engineering. Unlike dedicated CAD tools like SolidWorks or Fusion 360, Blender doesn’t include built-in tools for dimensioning, tolerance analysis, or generating engineering drawings. While you can create accurate models in Blender, it doesn’t have the parametric constraints that let engineers adjust a single dimension and automatically update the entire assembly. For most 3D printing and product design work for small consumer products, Blender is more than accurate enough, but for engineering projects that require strict tolerances and compliance with industry standards, it’s not a replacement for dedicated CAD software.
Large assembly modeling
If you’re working on a project with thousands of individual interconnected parts, like a full car engine or a large architectural project with hundreds of custom components, Blender can start to struggle with performance. While recent updates have improved Blender’s handling of large scenes, it’s still not as optimized for large assemblies as tools like SolidWorks or Revit. That said, for most artists and designers working on single models or small collections of assets, performance is more than sufficient on modern hardware.
Industry standard compatibility for large studios
While more and more large studios are adopting Blender, many major film and game studios still use proprietary software like Maya or 3ds Max for production. This means that if you’re a freelance artist looking to work exclusively for major AAA studios, you may still need to learn industry standard tools to match their pipeline. However, that trend is changing rapidly: Ubisoft, Sony Pictures Imageworks, and Netflix have all adopted Blender for parts of their production pipeline in recent years, and that number is growing every year. For independent creators, small studios, and freelancers, compatibility is rarely an issue, since Blender can import and export all common 3D file formats.
Learning curve for new users
One of the most common complaints about Blender from new users is its steep learning curve. For years, Blender had a unique interface and keyboard shortcut system that was very different from other 3D tools, which made it hard to switch from other software. While Blender 2.8 and newer versions updated the interface to be more intuitive, it’s still a fully featured professional 3D software, which means there’s a lot to learn. A new user can learn to create basic 3D models in a few weeks, but mastering all of Blender’s advanced modeling tools can take months of consistent practice. That’s not unique to Blender—all professional 3D tools have steep learning curves—but it’s a consideration for anyone just starting out.
Getting Started: A Step-by-Step Guide to Your First 3D Model in Blender
If you’re ready to try making your own 3D model in Blender, the process is more accessible than you might think, especially with the huge amount of free learning resources available online. Blender is 100% free to download and use, even for commercial projects, so you can start learning without any upfront investment. Below is a simple step-by-step process to create your first complete 3D model:
- Download and install Blender: Go to the official Blender website and download the latest stable version for your operating system (Windows, Mac, and Linux are all supported). Install it like any other program—no subscription or activation is required. When you open Blender for the first time, you’ll see a default scene with a cube, a camera, and a light.
- Learn the basic navigation: Blender’s navigation uses your mouse and keyboard to pan, zoom, and rotate the viewport. Use the middle mouse button to rotate the view, scroll the middle mouse button to zoom, and hold Shift + middle mouse button to pan. Spend 10 minutes practicing navigation before you start modeling—it’s the foundation of everything you’ll do in Blender.
- Block out your base shape: For your first model, start with something simple, like a mug or a chair. Delete the default cube by pressing the X key, then add a new cylinder (Shift + A > Mesh > Cylinder) to use as the base of your mug. Scale it up or down with the S key to get the right size, then switch to Edit Mode (Tab key) to start adjusting the shape.
- Refine your model: Use the extrusion tool (E key) to pull the top of the cylinder inward to create the opening of the mug, then use the bevel tool (Ctrl + B) to round the edges for a more natural look. Add a handle by creating a new curve, converting it to a mesh, and using a boolean modifier to join it to the main mug body. This simple process introduces you to the core tools you’ll use for almost any modeling project.
- Unwrap UVs and add materials: Once you’re happy with the shape, unwrap your model to create UVs, then add a material—for a mug, you might use a glossy white material with a bit of roughness to simulate ceramic. You can add a custom logo or design by importing an image and mapping it to your model.
- Render your final model: Switch to Rendered view mode to see a preview of your final model, then adjust the lighting and camera angle to get the look you want. Click the Render Image button to produce a high-quality final image you can share online.
To speed up your learning, there are hundreds of free high-quality tutorials available on YouTube, Blender’s official documentation site, and platforms like Coursera and Udemy. Some of the most popular resources for new users include Blender Guru’s “Blender Beginner Tutorial” series, which walks you through creating a donut model step by step, and the official Blender Studio training videos, which are free for all users.
Hardware requirements for Blender modeling
One of the biggest advantages of Blender for new users is that it runs well on most modern consumer hardware. You don’t need a $5,000 workstation to start making 3D models. The minimum requirements are:
- 64-bit quad-core CPU
- 8 GB of RAM (16 GB or more recommended for complex high-poly models)
- Graphics card with 2 GB of VRAM that supports OpenGL 4.3 (most integrated graphics made after 2015 meet this requirement)
- 5 GB of free storage space
If you’re only working on simple to medium-complexity models, you don’t need a high-end graphics card to get good performance. Rendering complex scenes will be slower on lower-end hardware, but for modeling itself, most mid-range laptops will work perfectly.
How Blender Compares to Other Popular 3D Modeling Tools
To put Blender’s capabilities in context, it’s helpful to compare it to other leading 3D modeling tools that are commonly used for different use cases:
Blender vs. paid professional tools (Maya, 3ds Max, ZBrush)
For general 3D modeling, Blender now matches or exceeds the capabilities of Autodesk’s Maya and 3ds Max for most use cases, at a fraction of the cost (free vs. $1,600 per year for an Autodesk subscription). ZBrush is still the industry standard for high-poly sculpting, and has more advanced brush options than Blender, but Blender’s sculpting toolset has improved dramatically in recent years, and it’s more than sufficient for most artists. The biggest advantage Blender has over paid tools is its open-source development model, which means updates are free forever, and anyone can contribute to improving the software or create custom add-ons to add new functionality.
Blender vs. SketchUp
SketchUp is a popular tool for beginner 3D modeling and architectural design, especially for users who want a simple interface. Blender is much more powerful than SketchUp for detailed modeling, rendering, and animation, but it has a steeper learning curve. If you just need to create simple architectural models for 3D printing or visualization, SketchUp’s simpler interface may be a better fit, but if you want to create high-quality renders or complex organic models, Blender is the better choice.
Blender vs. Fusion 360
Fusion 360 is a popular CAD tool for product design and 3D printing, with built-in parametric modeling and engineering tools. Blender is better for artistic modeling, organic shapes, and rendering, while Fusion 360 is better for precise technical modeling and engineering. Many 3D printing enthusiasts use both: they model the basic shape in Fusion 360 for precision, then export it to Blender to add details, texture, and render final images.
Conclusion
Blender is more than capable of creating high-quality, professional 3D models for almost every use case, from indie game assets and animated characters to architectural visualizations and 3D-printable products. Its open-source license makes it free to download and use for any purpose, commercial or non-commercial, which has made it the go-to tool for independent creators, small studios, and even large production companies looking to cut costs without sacrificing quality. While it has limitations for highly specialized engineering work and large-scale industrial projects, for 90% of 3D modeling use cases, it’s every bit as capable as expensive paid alternatives.
If you’re new to 3D modeling, Blender is the best place to start: you don’t have to pay anything to try it, there are thousands of free learning resources available, and the skills you learn will transfer to other 3D tools if you ever need to switch. For professional artists looking to add a new tool to their workflow, Blender can replace multiple expensive programs by handling modeling, sculpting, texturing, rendering, and animation all in one place. The bottom line is: not only can you make 3D models in Blender, but for most creators, it’s one of the best tools available for the job.