
Architectural and design professionals often switch between Autodesk Revit and Trimble SketchUp for different stages of a project: Revit excels at detailed BIM (Building Information Modeling) documentation and coordinated construction data, while SketchUp offers intuitive freeform modeling, quick conceptual design iteration, and easy sharing with clients who don’t have access to professional BIM software. If you’ve spent hours building a detailed 3D model in Revit, you don’t need to rebuild it from scratch to leverage SketchUp’s strengths. Importing a Revit model into SketchUp is a straightforward process when you follow the right steps, and it saves you time while preserving as much detail as possible. In this guide, we’ll walk through every method, common pitfalls, and best practices to get a clean, usable model every time.
Preparing Your Revit Model for Export
Before you export anything from Revit, taking a few minutes to clean up and organize your model will save you hours of troubleshooting messy geometry in SketchUp later. Revit files store far more data than SketchUp needs, including BIM schedules, linked files, hidden annotations, and redundant detail that can bloat your export file or cause import errors. A little preparation goes a long way toward getting a clean result.
Clean Up Unnecessary Geometry and Data
Start by isolating the parts of the model you actually need to import. If you’re working on a multi-story building, you don’t need to import the entire structural model if you only need the ground floor facade for a conceptual design study. Use Revit’s visibility tools to turn off categories you don’t need: annotations, dimensions, tags, wiring, plumbing fixtures, and structural reinforcements are all commonly hidden for 3D model exports. You should also delete any unused groups, imports, or linked CAD files from your Revit project to reduce file size.
Next, check for overlapping or duplicated geometry that can cause issues during the import process. Revit allows multiple elements to occupy the same space without issue, but SketchUp will often render these overlaps as messy boolean errors or broken faces. Use Revit’s Check Duplicates tool to find and remove redundant elements, and fix any warnings about unconnected or misplaced walls, roofs, or floors before you export.
Align Your Coordinate System
One of the most common mistakes new users make is forgetting to check Revit’s base point before export. If your coordinate system is misaligned, your model may import into SketchUp miles away from the origin point, causing zoom, pan, and rendering issues that are hard to fix later. Revit uses three different coordinate points: project base point, survey point, and internal origin. For most imports, you’ll want to export your model relative to the project base point, which keeps your model centered and at the correct real-world scale.
To confirm your coordinate system, enable the visibility of both the project base point and survey point in the Visibility/Graphics window. Move the project base point to the bottom corner of your model if it’s currently positioned far away, then note the coordinates to confirm your model’s overall dimensions match what you expect. A 10-meter wide building shouldn’t show coordinates in the thousands, for example—this indicates your base point is misaligned.
Check Model Scale and Units
SketchUp relies on consistent units to maintain scale, so confirm that your Revit model is using the correct unit system (imperial or metric) before export. If you’re collaborating with a team that uses a different unit system, set the export units to match what your SketchUp project uses to avoid conversion errors. For example, if your Revit model is built in millimeters but your SketchUp template uses meters, a 3000mm wall will import as 3000 meters instead of 3 meters if you don’t adjust the export settings.
Popular Export and Import Methods (Step-by-Step)
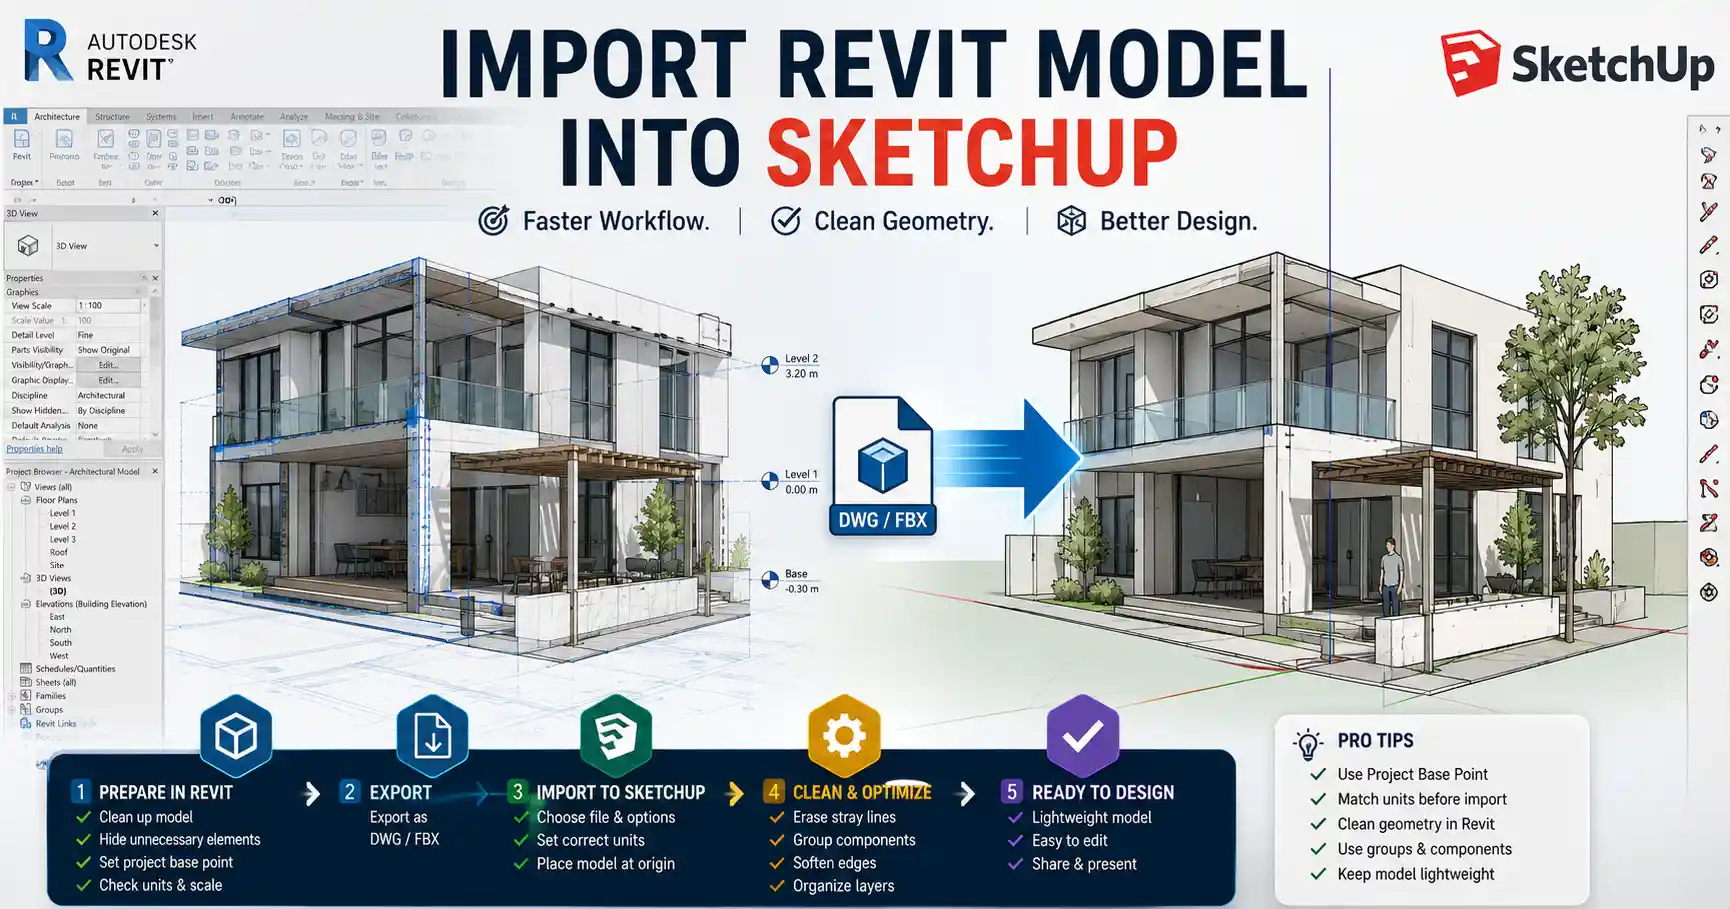
There are three main methods to get a Revit model into SketchUp, each with different advantages depending on your needs, software version, and budget. We’ll break down each method step-by-step so you can choose the one that works best for you.
Method 1: Export as DWG/DXF, Then Import to SketchUp
This is the most common, free method that works with all versions of Revit and SketchUp, no third-party plugins required. DWG is a universal CAD format that both programs support natively, so you don’t need any extra tools to make it work. Here’s the step-by-step process:
- In Revit, open your prepared 3D view. Go to the File > Export > CAD Formats > DWG menu.
- Choose your export location, select the version of DWG you want to export (we recommend 2018 or earlier for maximum compatibility with SketchUp).
- Adjust the export settings: under “Layers”, select “Export layers by Revit category” to keep your model organized in SketchUp. Under “Coordinates”, select “Project base point” to align your model correctly.
- Click “OK” to export the DWG file to your computer.
- Open SketchUp, create a new project with the correct unit template matching your export units.
- Go to File > Import, select “DWG” from the file type dropdown, find your exported file, and click “Options” to confirm the unit conversion is set correctly.
- Click “Import” and choose a location to place your model in the SketchUp canvas. Most users prefer to click the origin point (0,0,0) to keep the model centered.
The main advantage of this method is that it’s free and works for every user. The downside is that you lose all BIM data, and curved or complex geometry can sometimes be triangulated incorrectly, resulting in thousands of extra faces that bloat your SketchUp file.
Method 2: Export as FBX, Then Import to SketchUp
FBX is a 3D interchange format developed by Autodesk that preserves more geometry information than DWG, especially for curved surfaces and complex components. It’s also free and natively supported by both programs, making it a great alternative to DWG for models with lots of organic or rounded shapes. The steps for this method are very similar:
- In Revit, prepare your 3D view and go to File > Export > 3D Model > FBX.
- In the FBX export settings, select “Selected views” and check your 3D view. Adjust the units to match your SketchUp project, and enable “Export linked files as separate nodes” if you want to keep linked models separate in SketchUp.
- Export the FBX file to your computer.
- In SketchUp, go to File > Import, select “FBX” as the file type, and adjust the import units to match your export settings.
- Import the file to the origin point and check your geometry for errors.
Many users find that FBX exports produce cleaner geometry than DWG for modern Revit models, but they can also result in larger file sizes. FBX also doesn’t preserve Revit layer organization as reliably as DWG, so you may need to do more organization work in SketchUp after import.
Method 3: Use a Third-Party Plugin for Direct Import/Export
If you work with Revit and SketchUp regularly, a paid third-party plugin can streamline the process dramatically and preserve more data than the native export methods. The most popular options are:
- Imports for Revit by SketchUp’s official developer team: This plugin adds direct Revit import to SketchUp Pro, preserving family structure, layers, and materials more accurately than generic file formats.
- RVMPRO (Revit to SketchUp): A popular paid plugin that exports directly from Revit to SketchUp’s native .skp format, eliminating the need for intermediate file conversions. It preserves materials, layers, and object hierarchy, and automatically cleans up redundant geometry.
- CAD Importer for SketchUp: A free plugin that improves on SketchUp’s native DWG import, with better handling of large models and layer organization.
The step-by-step process for direct plugin export is simple: install the plugin in either Revit or SketchUp, follow the plugin’s prompts to select the Revit file or 3D view you want to transfer, adjust settings for level of detail, and generate the SketchUp file directly. The main downside is cost: most high-quality direct transfer plugins cost between $50 and $200 for a permanent license, which is a worthwhile investment for frequent users but unnecessary for occasional one-time imports.
“The biggest mistake I see new users make when moving from Revit to SketchUp is bringing over every single piece of data from the original BIM model. You don’t need 10,000 tiny door hardware components in a SketchUp client presentation. Simplify before you transfer, and you’ll end up with a faster, cleaner model that works exactly how you need it to.”
Fixing Common Import Issues
Even with careful preparation, you may run into common issues after importing your Revit model into SketchUp. Most problems have simple fixes, and knowing how to address them will save you hours of frustration.
Misaligned Geometry and Broken Faces
Broken faces are the most common issue after import, especially when exporting from Revit as DWG. This happens when Revit exports overlapping edges, non-coplanar faces, or tiny gaps between walls that SketchUp can’t automatically interpret as a solid face. To fix broken faces:
- Use SketchUp’s Edge Softening tool to smooth out extra edges created by triangulated geometry from Revit exports.
- Check for tiny gaps between edges: use the zoom tool to get close to the broken area, and use the Line tool to redraw missing edges to close the face.
- Use the Intersect Faces tool to clean up overlapping geometry from imported linked Revit files.
- For large areas with multiple broken faces, use a plugin like CleanUp³ to automatically remove redundant edges and heal small gaps.
Overly Large File Size and Slow Performance
It’s common for imported Revit models to be much larger than necessary, especially if you brought over all the original detail. A large SketchUp file will lag when panning, zooming, or rendering, so it’s important to reduce the file size after import. Some effective strategies include:
- Hide or delete components and geometry you don’t need. If you imported an entire 10-story building but only need the facade, delete the interior floors, walls, and MEP fixtures to cut file size dramatically.
- Collapse repeating components into components. Revit exports every window as a separate group by default, but you can turn 50 identical windows into a single component in SketchUp to reduce file size.
- Use SketchUp’s Purge Unused tool to remove unused materials, components, and layers from your model. You can find this under Window > Model Info > Statistics > Purge Unused.
- For very large models, use the Reduce Polygons tool or a plugin like QuadFace Tools to simplify curved geometry without losing the overall shape.
Incorrect Scale and Misplaced Origin
If your model imports at the wrong scale or ends up miles away from the SketchUp origin, don’t panic—these are easy fixes. If the scale is wrong, you can use SketchUp’s Tape Measure tool to rescale the entire model: measure a known dimension (for example, a 3-meter wall), type the correct dimension into the value box, and confirm that you want to rescale the entire model. If your model is misplaced far from the origin, use the Move tool to select the entire model, click on the bottom corner of your model, and move it to the 0,0,0 origin point in SketchUp. Keeping your model near the origin prevents zoom and pan bugs that are common when geometry is placed thousands of kilometers from the origin.
Missing Materials and Textures
Most generic export methods don’t preserve Revit materials perfectly, so you may end up with a model full of default white or gray faces after import. To fix this, use the layer organization that came from your DWG export: most Revit exports separate layers by category (walls, roofs, windows, etc.), so you can assign a uniform material to all objects on a single layer all at once using SketchUp’s material browser. If you used a direct import plugin, most will preserve basic material assignments automatically, so you’ll only need to adjust texture scaling to match your model’s scale.
Best Practices for a Clean, Usable Result
Beyond the basic import process, following these best practices will ensure your imported model works well for its intended use, whether that’s client presentations, conceptual design, or 3D rendering.
Adjust Level of Detail for Your Use Case
The level of detail you need for an import depends entirely on what you’re using the SketchUp model for. If you’re creating a quick massing study for a client, you don’t need to import every door handle and light fixture. Exporting only the outer shell and major internal walls will give you a small, fast model that’s easy to work with. If you’re creating a detailed 3D render for marketing, you can import more detail, but you should still simplify small non-visible components to keep the file manageable.
To control level of detail in Revit before export, use the detail level setting in your 3D view: set it to Coarse for massing studies, Medium for general design work, and Fine only for detailed renders. This automatically hides small detail at coarser settings, reducing the amount of geometry you have to clean up in SketchUp later.
Keep Your Model Organized with Layers and Components
Take advantage of the layer organization you get from a DWG export to keep your model organized in SketchUp. Keep major categories (walls, roofs, floors, furniture) on separate layers so you can quickly hide or isolate parts of the model as you work. Group related geometry into components, especially if you need to move or edit parts of the model independently. For example, group all the furniture on the second floor into a single component so you can hide it when you’re working on the first floor.
Preserve BIM Data Where Possible
If you need to keep BIM data like room numbers, material specifications, or cost information when moving from Revit to SketchUp, you have a few options. Direct import plugins like RVMPRO can export basic Revit parameters to SketchUp component attributes, so you can still access the data inside SketchUp. If you’re using a generic export method, you can export a schedule of BIM data from Revit as a CSV file and use a SketchUp plugin like Dynamic Components to attach the data to your components manually.
Check for Errors Before Sharing
Before you share your SketchUp model with a client or collaborator, take a few minutes to check for common issues: orbit the model to check for missing faces, purge unused data to reduce file size, confirm the scale is correct, and make sure the model is centered near the origin. A quick check will prevent embarrassing issues like broken geometry or a file that’s too large to email to clients.
Conclusion
Importing a Revit 3D model into SketchUp doesn’t have to be a complicated or frustrating process. By preparing your model carefully before export, choosing the right method for your budget and frequency of use, and knowing how to fix common issues, you can transfer your model quickly while preserving the detail you need. For occasional users, the free DWG or FBX export method works perfectly for most use cases, while frequent users will benefit from the time savings of a paid direct import plugin. The key takeaway is that less is more: only import the detail you actually need, clean up your model before export, and you’ll end up with a clean, fast, usable SketchUp model that leverages the strengths of both programs for your project.