
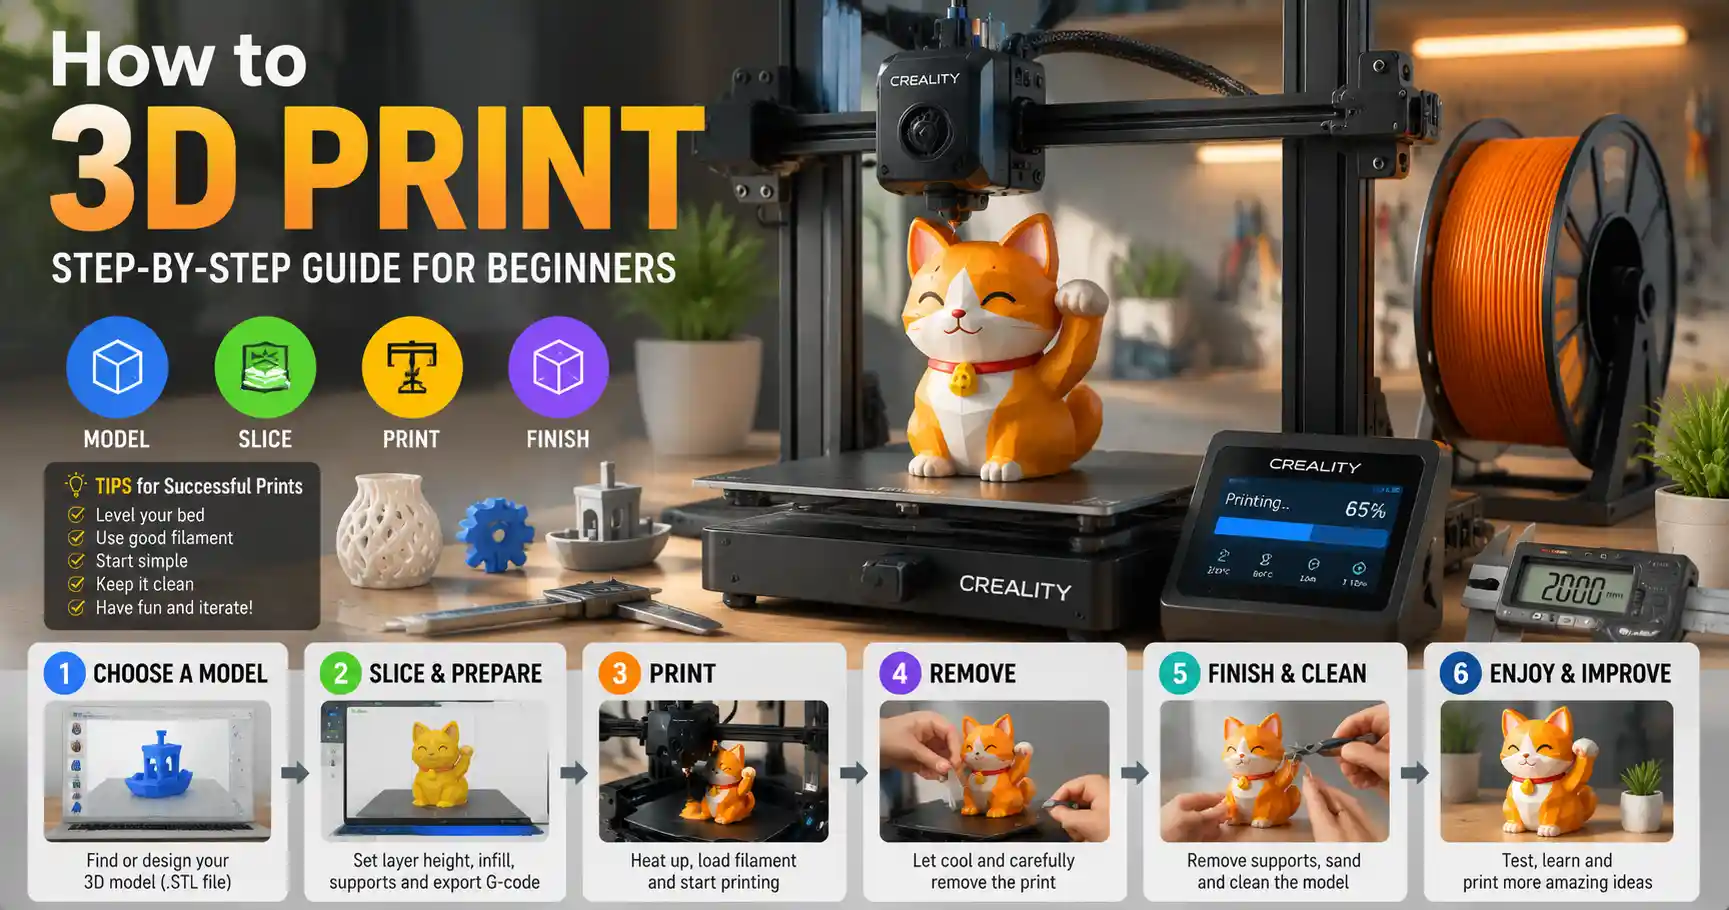
3D printing has transformed from an expensive industrial tool to an accessible hobby that lets anyone turn digital ideas into physical objects sitting on their desk. Whether you want to print a custom phone stand, a replacement part for a broken appliance, or a detailed figurine of your favorite character, the process follows a consistent, learnable path that doesn’t require a engineering degree to master. Even if you’ve never touched a 3D printer before, breaking the process down into clear steps removes the confusion and helps you avoid the common mistakes that ruin first prints. This guide walks you through every stage, from finding a model to removing your finished object from the build plate, so you can get great results on your first try.
Pre-Print Preparation: Choose and Prep Your Model
Before you even turn on your 3D printer, the bulk of successful printing happens in the preparation stage. The first step is getting or creating a 3D model that’s suitable for your printer and your goals. New printers often come with a few pre-loaded test models (like the popular 20mm calibration cube or Benchy the boat) that are perfect for your first print, but if you want something custom, you have several options to source files.
Finding or Creating a 3D Model
For beginners, downloading a pre-made model from a reputable repository is the easiest way to get started. Popular platforms like Thingiverse, MyMiniFactory, and Printables host millions of free, user-tested models designed for consumer 3D printers, ranging from simple household items to complex cosplay props. When browsing, look for models labeled “printable” or “tested” to avoid files with hidden errors that will cause your print to fail.
If you want to design your own model, there are beginner-friendly software options that don’t require years of experience. Free tools like Tinkercad run in your web browser and use simple drag-and-drop building blocks to create basic shapes, while more advanced free options like Blender or Fusion 360 let you design complex, functional parts. No matter how you get your model, it needs to be saved as an STL file – the standard file format that 3D printing software uses to read model geometry.
Check and Repair Model Errors
Not all STL files are created equal. Even models downloaded from popular sites can have small errors like non-manifold geometry, overlapping faces, or holes in the mesh that will cause slicing software to misread the model and produce a bad print. This step is easy to skip, but catching errors here saves you hours of wasted time and filament later.
Most slicer programs have basic built-in repair tools, but for more thorough fixes, free online tools like MeshLab or Meshmixer can automatically repair common errors. When checking your model, look for these common issues:
- Overlapping walls or double-sided faces that confuse the printer about where to extrude filament
- Holes or gaps in the outer surface that create empty spots in solid parts
- Extra stray vertices or tiny geometry floating away from the main model
- Models that are larger than the maximum build volume of your printer
Resizing a model is one of the most common edits beginners need to make. Always check your printer’s build volume (for example, a common Ender 3 V2 has a 220 x 220 x 250mm build volume) and scale your model down if it’s too large to fit. If you’re printing a functional part that needs to be an exact size, double-check the model dimensions in your editing software before exporting.
Slice Your Model: Turn 3D Models Into Printer Instructions
Once your model is prepped and saved as an STL, the next step is slicing: the process of converting the 3D model into a stack of 2D layers and generating G-code, the language your 3D printer uses to understand where to move and how much filament to extrude. Slicing software is where most of your print quality settings are adjusted, and getting this step right is the biggest factor in how your finished print turns out.
Choose a Slicer and Import Your Model
Beginners don’t need to pay for expensive slicing software – the most popular options are completely free. Cura, developed by 3D printer manufacturer Ultimaker, is the go-to choice for most hobbyists thanks to its user-friendly interface and pre-made profiles for nearly every consumer 3D printer on the market. PrusaSlicer is another popular free option, favored for its reliable supports and high-quality output for complex models. Both work with any brand of printer, not just the manufacturer’s own models.
After installing your slicer, the first step is to select your specific printer model from the dropdown menu. This automatically sets up base settings like build volume, nozzle size, and movement limits that match your machine, so you don’t have to guess basic parameters. Then, simply import your STL file into the slicer, and drag it to position it on the virtual build plate. Try to place it in the center of the bed for the most consistent adhesion, unless you’re printing multiple items at once.
Key Settings to Adjust for Quality and Strength
Most beginners can start with the pre-set “Standard” quality profile that comes with your printer, and adjust small settings to match your project. Understanding what these settings do will help you tweak your print to get exactly what you want. The most important settings to know are:
- Layer height: This is the thickness of each 2D layer the printer lays down. A lower layer height (0.12-0.16mm) gives smoother, more detailed surfaces but takes much longer to print. A higher layer height (0.2-0.3mm) prints faster but shows visible layer lines. 0.2mm is the default sweet spot for most prints, balancing quality and speed.
- Infill density: Infill is the internal support structure inside solid parts. A 10-20% infill is fine for decorative items that don’t need to hold much weight. Functional parts that need strength, like a tool handle or replacement bracket, should use 50-100% infill. Higher infill uses more filament and takes longer, so don’t use more than you need.
- Wall thickness: This is the thickness of the outer solid walls of your print. Most printers have a 0.4mm nozzle, so using a multiple of 0.4mm (1.2mm = 3 walls, 1.6mm = 4 walls) gives the cleanest results. For functional parts, use 1.6-2mm wall thickness to add strength without adding as much extra weight as full infill.
- Supports: Supports are extra structures that hold up overhanging parts of the model that would otherwise sag or collapse when printing. Most slicers can automatically generate supports anywhere the model has an overhang steeper than 45-50 degrees. For complex models with lots of overhangs, use tree supports (available in Cura and PrusaSlicer) that use less filament and are easier to remove than regular supports.
- Adhesion helpers Most printers need an adhesion helper to stop the edges of the print from curling up off the build plate during printing. A brim is a thin extra border around the base of the print that adds surface area for better adhesion, while a raft is a thick solid base under the entire print that works well for small models or flexible filaments. For most prints on a glass or textured bed, a brim is all you need.
Once you’ve adjusted your settings, the slicer will preview the layers so you can check for any gaps or errors. When you’re happy, export the G-code file to an SD card or USB drive, which you’ll plug into your 3D printer.
Set Up Your 3D Printer for Printing
“90% of 3D printing failures happen before the first layer is ever laid down.”
This common saying among 3D printing hobbyists rings true for most new printers. Proper bed preparation and first layer calibration are far more important than fancy slicer settings for getting a successful print. Even the most expensive 3D printer will produce garbage if the first layer isn’t positioned correctly against the build plate.
Calibrate the First Layer
The first layer needs to be squished slightly against the build plate to stick well, but not so much that it’s flattened into the bed and can’t be removed. If the nozzle is too far away, the filament will just be laid down loosely on the bed and won’t stick, often causing the whole print to shift or come loose mid-print. If the nozzle is too close, it can’t extrude filament at all, or the print gets so stuck it cracks the bed when you try to remove it.
Most new 3D printers come with automatic bed leveling that uses a sensor to map the height of the bed across the entire surface, which removes most of the guesswork. If you have an older printer or manual bed leveling, the standard “paper test” is a reliable way to get the right height:
- Heat the nozzle and bed to your printing temperatures, then move the nozzle to the first corner of the bed.
- Slide a piece of standard printer paper between the nozzle and the bed. Adjust the bed height until you feel a slight drag on the paper when you pull it, but it still moves freely.
- Repeat this process for all four corners and the center of the bed, rechecking the first corner after adjusting the others, since adjusting one corner can change the height of the others.
After manual leveling, it’s always a good idea to print a single layer first layer test pattern (available for free on most model repositories) to check how evenly the filament is laid down before starting a full print.
Load Filament and Prepare the Bed
Before you start the print, you need to load the correct filament into your printer and prep the bed to help the print stick. First, check that your filament is dry – hygroscopic filaments like nylon and PETG absorb moisture from the air over time, which causes bubbling, popping, and weak layers. If your filament is spool has been open for more than a few months in a humid climate, dry it in a dedicated filament dryer or a low-temperature oven before printing.
Load the filament into the extruder according to your printer’s instructions, and extrude a small amount of filament out of the nozzle to make sure it’s flowing evenly. Wipe any old filament off the nozzle with a paper towel before starting the print.
How you prep the bed depends on what type of build plate you have:
- Textured PEI Sheet: PEI sheets have a naturally grippy surface that most filaments stick to well when heated, so you usually don’t need any extra adhesive. Just make sure the sheet is clean and free of dust or leftover adhesive from old prints.
- Glass Build Plate: Glass beds need a thin layer of adhesive to help filament stick. Popular options include hairspray, PVA glue stick, or specific 3D printing adhesive sprays. Apply a thin even layer across the area where your print will sit.
- Flexible Build Plate: Most flexible plates come with a textured coating that works like PEI, but a little bit of glue stick can help for large prints or ABS filament that tends to warp.
For filaments that warp easily, like ABS orASA, make sure your printer is enclosed to keep the temperature consistent and reduce drafts that cause cooling too quickly. Even a simple enclosure made from cardboard around the printer can make a big difference for warping-prone filaments.
Starting the Print and Post-Print Processing
Once your printer is set up and your G-code is loaded, it’s time to start the print. It’s always a good idea to stay near the printer for the first 5-10 minutes of the print, so you can stop it early if something goes wrong instead of wasting hours of printing time. Common issues to watch for in the first few layers are filament not sticking, the print coming loose from the bed, or the nozzle dragging through already printed layers.
If everything looks good after the first few layers, you can leave the printer to finish its work – most prints take anywhere from 30 minutes to several hours, depending on size and quality settings. When the print finishes, don’t immediately try to yank it off the build plate. For most heated beds, let the bed cool completely to room temperature before removing the print. As the bed cools, it contracts slightly, and most prints will pop right off on their own, which reduces the risk of breaking the print or damaging the build plate.
Remove Supports and Adhesion Helpers
Once your print is off the bed, the first step in post-processing is removing any extra material you added during slicing: supports, brims, and rafts. For most PLA prints, supports are easy to remove by hand with a pair of needle-nose pliers. Start at the base of the support and gently wiggle it back and forth until it breaks away from the print. For deeper or more tightly fitted supports, a small hobby knife can help cut the support away from the model without damaging the surface.
Tree supports are much easier to remove than regular supports, because they only touch the model at small points, so they leave much smaller marks on the finished surface. Brims usually peel off easily by hand, but rafts may need a little more work to separate from the base of the print, and you may need to sand the bottom of the print to get a smooth finish after removing a raft.
Sand and Finish Your Print
Depending on what you’re using the print for, you can stop after removing supports, or you can do extra finishing to get a smoother, more professional look. Layer lines are a natural part of FDM 3D printing, but they can be hidden with a little sanding and filling. Start with 120-grit sandpaper to sand down large bumps and layer lines, then work your way up to 400-grit and even 800-grit for a very smooth surface. If you have large gaps or uneven spots, you can fill them with epoxy filler or wood filler before sanding.
After sanding, you can paint your print with acrylic paint to add color, or spray it with a clear coat to seal the surface and give it a glossy or matte finish. For functional parts, you can also add tapping threads to screw holes if you need to attach the part to something else – just make sure you sized the hole correctly in your model before printing to fit the tap you’re using.
Troubleshooting Common 3D Printing Problems
Even experienced 3D printers deal with failed prints from time to time, but most problems have simple fixes once you know what to look for. Here are the most common issues beginners face and how to solve them:
Print Doesn’t Stick to the Bed: This is almost always a first layer calibration issue. If your nozzle is too far from the bed, the filament won’t squish down enough to stick. Double-check your bed leveling, and make sure your bed temperature is high enough for your filament (PLA usually needs 50-60C, PETG needs 60-80C). Adding a little extra adhesive or a brim can also help with stubborn prints.
Stringing or Blobbing Between Parts: Stringing is when tiny strands of filament are left between different parts of the print, like the gaps between the fingers of a figurine. This happens when the nozzle oozes filament as it moves across empty space. Turn on retraction in your slicer settings – retraction pulls the filament back slightly when the nozzle moves, which stops oozing. If you still get stringing, increase the retraction distance by 1mm at a time until it stops.
Layer Shifting or Misaligned Layers: If your print has layers that are shifted horizontally, that usually means the printer’s belt has slipped, or the nozzle hit a part of the print that came loose. Check that your X and Y axis belts are tight enough (they shouldn’t sag when you press them) and that the bed is clean and the print is stuck down firmly. Printing too fast can also cause layer shifting, so try reducing your print speed by 10-20% to see if that fixes the problem.
Warping Edges: Warping is when the corners of the print curl up off the bed as it cools, caused by filament contracting as it cools down. This is most common with ABS and PETG. Make sure your bed temperature is high enough, and enclose the printer to stop drafts from cooling the edges too quickly. A brim or raft also helps hold the edges down against the bed.
Conclusion
3D printing may seem intimidating at first, but it’s a skill that gets easier with every print you make. By breaking the process down into clear steps – prepping your model, slicing with the right settings, calibrating your first layer, and finishing your print after it’s done – you can avoid most of the common mistakes that trip up new hobbyists. Start small with a simple test print to get comfortable with your printer, then work your way up to more complex models as you learn what settings work best for your machine. Every failed print teaches you something new, and over time, you’ll be able to turn almost any digital idea into a solid, functional object you can hold in your hand.